
If you’re like most Disney fans, you’ve probably already heard that Disney has just launched the new MagicBand+ for Disney World! And if you’re anything like us, you probably can’t wait to to link it with the My Disney Experience app, pair it over bluetooth with your mobile device and take advantage of all the awesome new features that are offered.
If you’re feeling a little overwhelmed with getting your MagicBand+ up and running, not to worry – we’ve got you covered! In this how-to article, we will walk you through the steps of linking your MagicBand+ with the My Disney Experience app. So sit back, relax, and let us walk you through it step-by-step!
Instructions For Linking A MagicBand+ In The My Disney Experience App
You can click each expandable section below to view in-depth instructions and screenshots.
Prerequisites
First off, you will need to have the My Disney Experience app downloaded on your phone, as well as a MagicBand+ device that you wish to link to your account and pair with your mobile device.
It would also be helpful to log into your Disney account on the My Disney Experience App, but if you have not done so, you will be prompted to log into once you start the process that we will outline below.
Tap The Menu Button, Then Tap MagicBands & More
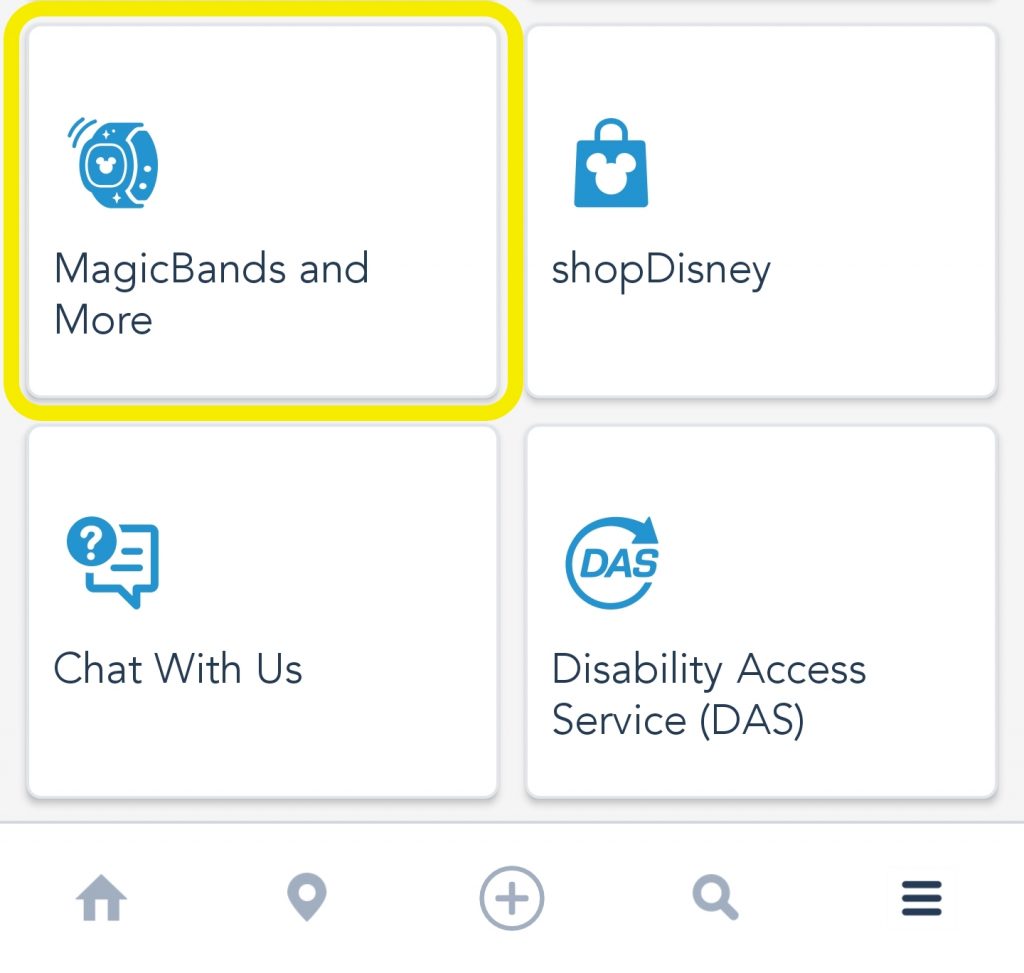
To start the process of linking your new MagicBand+ to your Disney account, you first need to tap the menu button that’s located in the lower left-hand corner of the app. Then, scroll down until you see a “MagicBands & More” card and tap on that as well.
Tap On Link Your MagicBand or Card
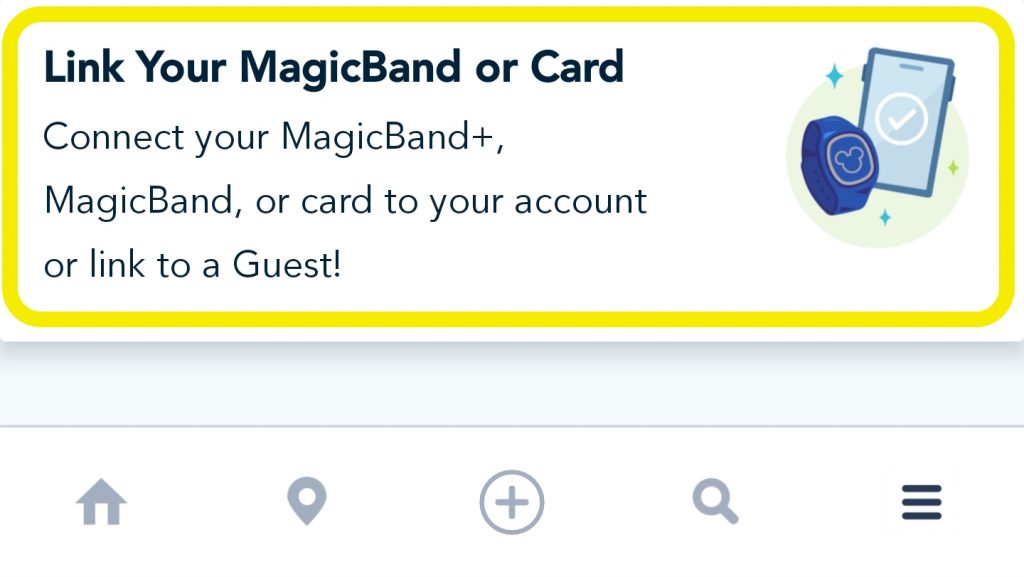
Next, you will be brought to the “Your MagicBands and More” page. Near the bottom of this page, you will need to tap on “Link Your MagicBand or Card”.
Select Your Linking Method
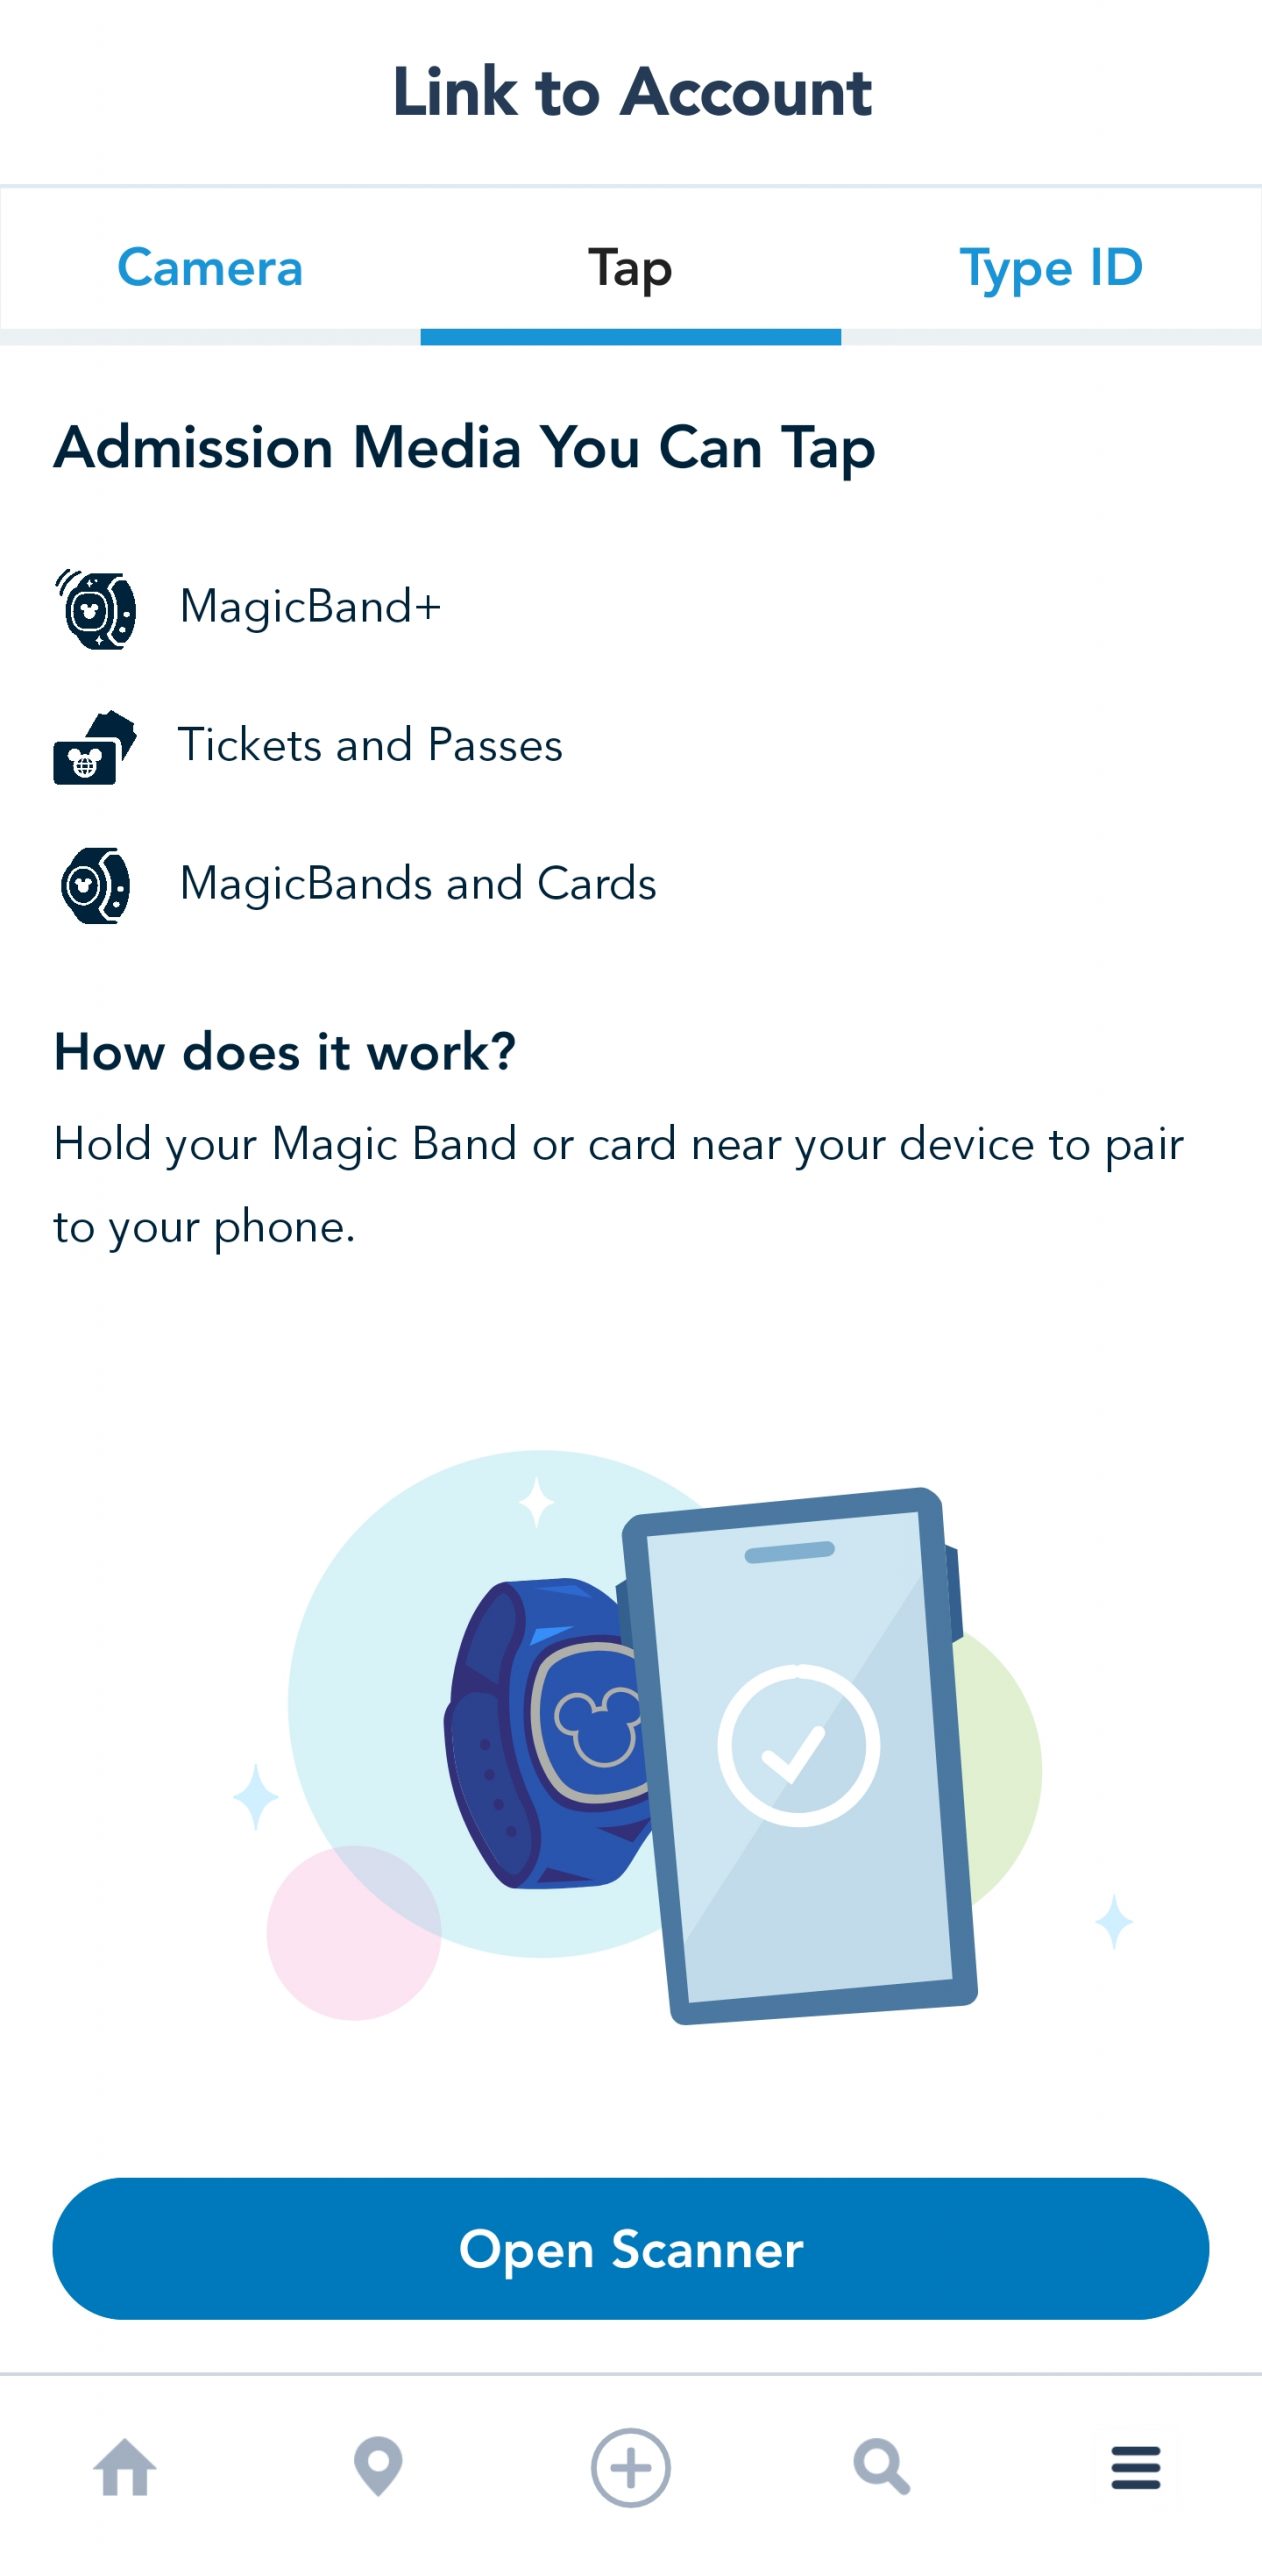
You will have 3 options for sharing the unique identifiers that belong to your MagicBand+ with the My Disney Experience App.
Tap
Tap will be selected automatically, and in our opinion is the easiest method for linking your MagicBand+. All you have to do is tap the “Open Scanner” button at the bottom of the screen, then tap your band to the back of your phone. You may have to try tapping your MagicBand+ in a few different locations on your phone to get the right spot. Try in the center of the back of the phone, then the top of the back of your phone, and if all else fails the tap to the top of your phone, and your MagicBand+ will instantly share it’s unique indentifiers with the My Disney Experience App.
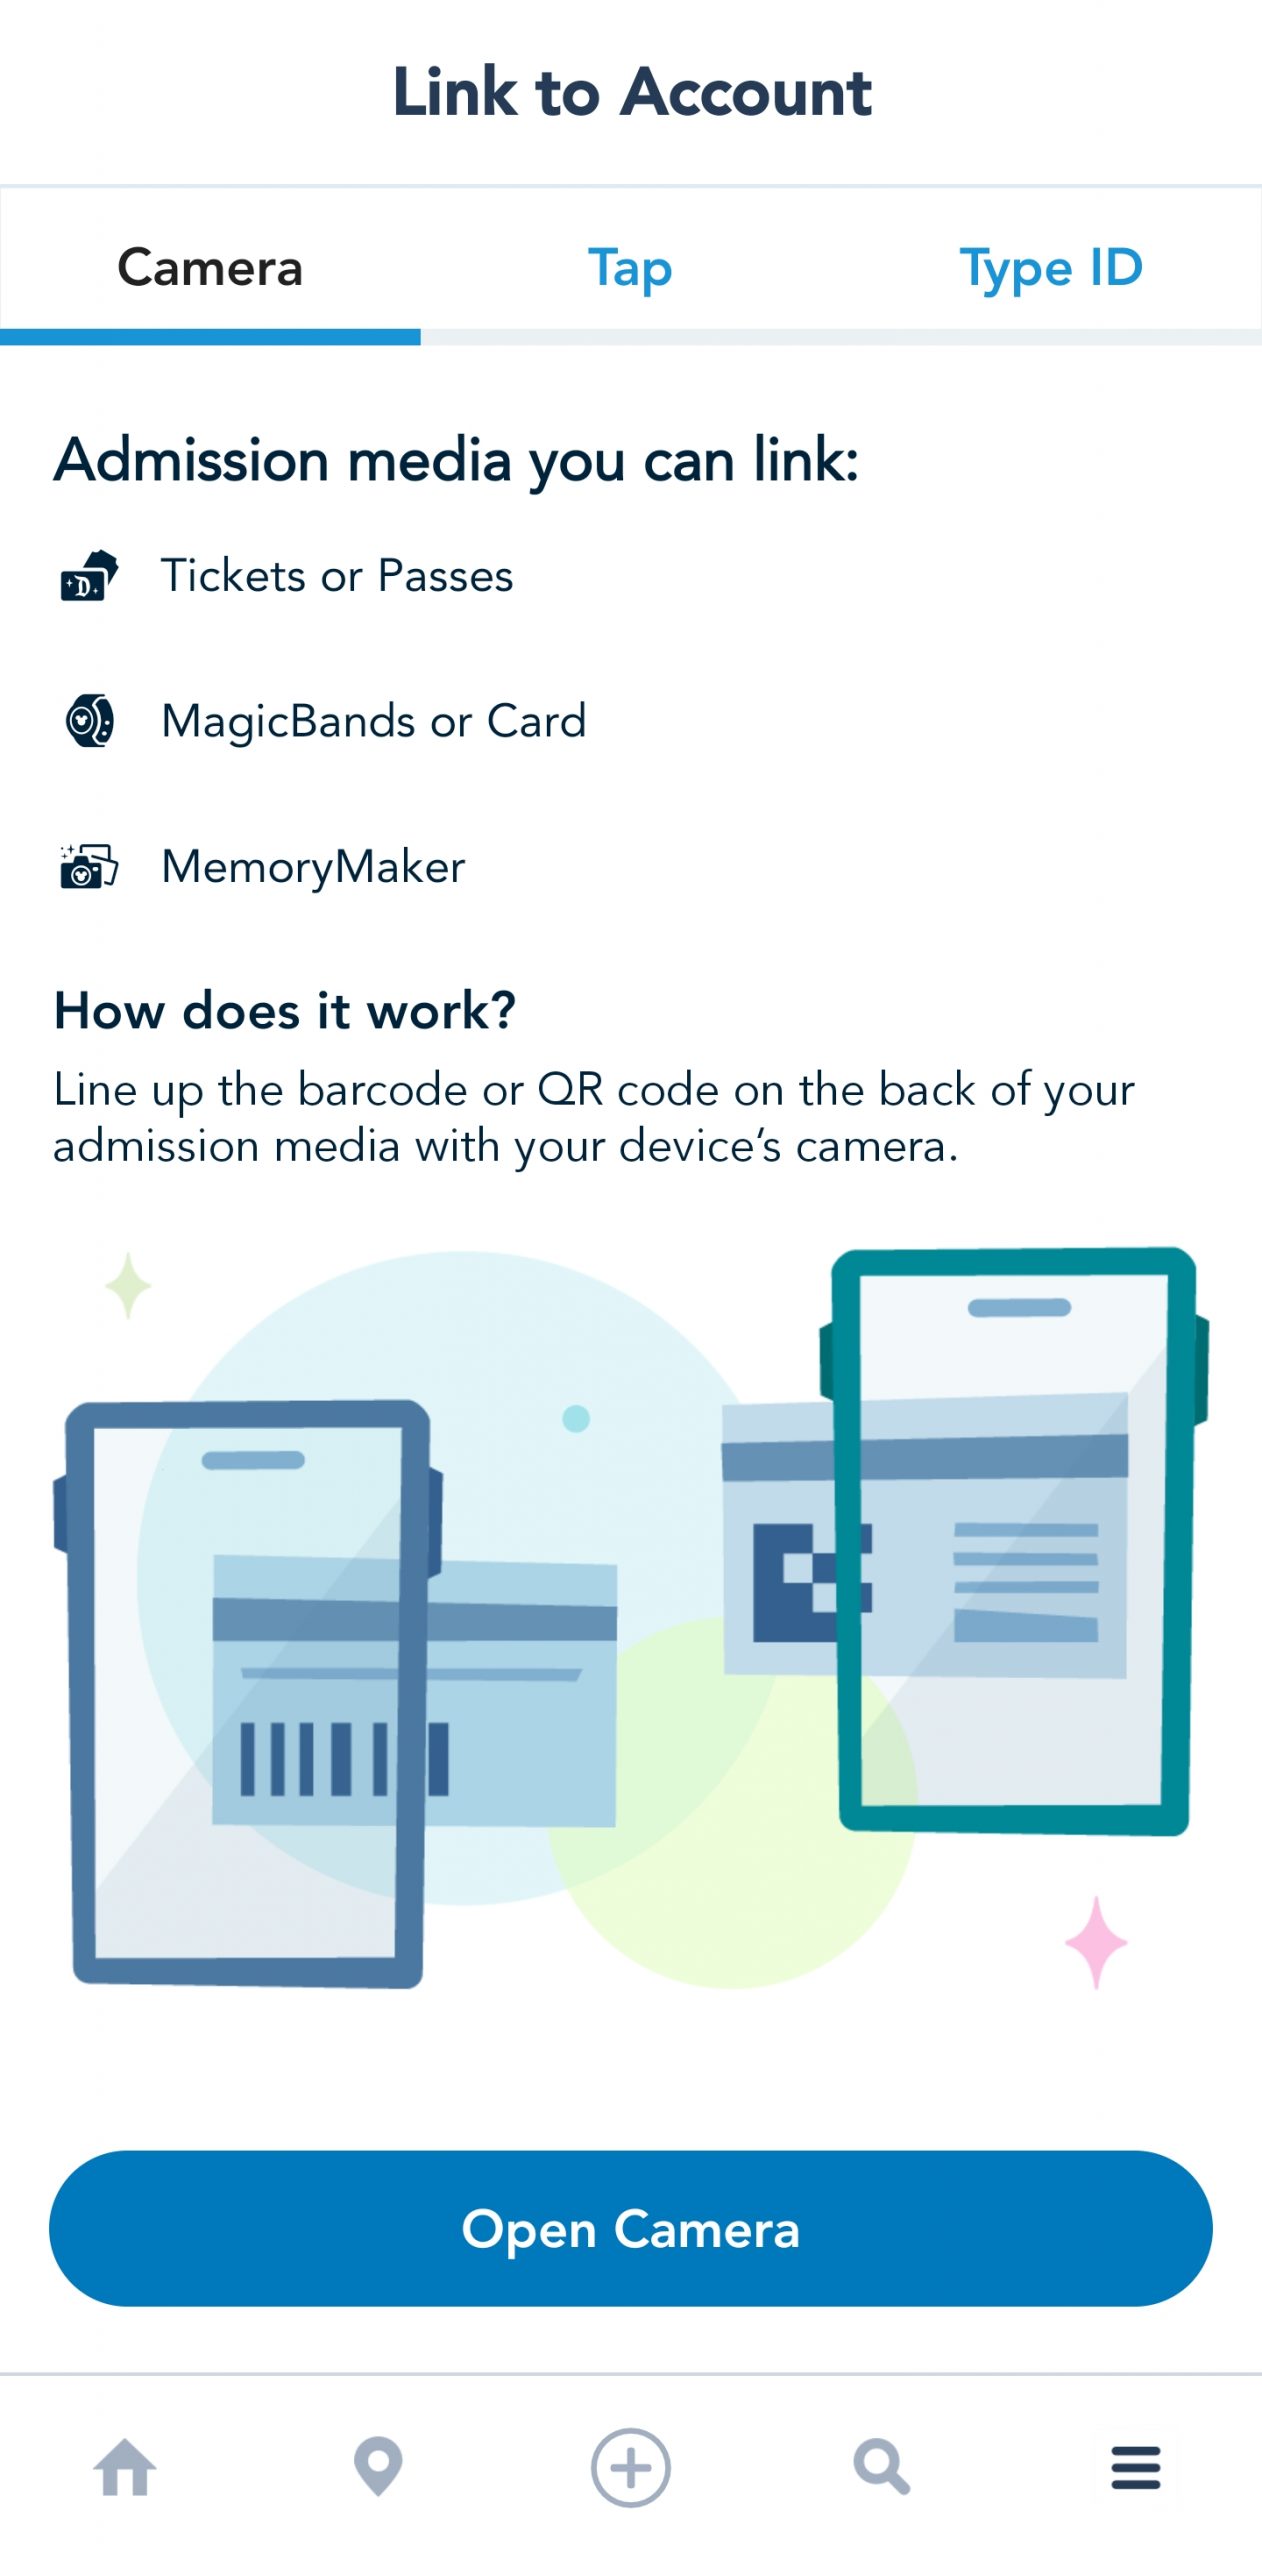
Camera
If your mobile device does not feature NFC technology or you’re having trouble adding your MagicBand+ by tapping, you can always select the Camera option on the top left of the screen, then tap the “Open Camera” button at the bottom of the screen. You will need to scan a QR code that is on the back of the box your MagicBand+ came inside of.
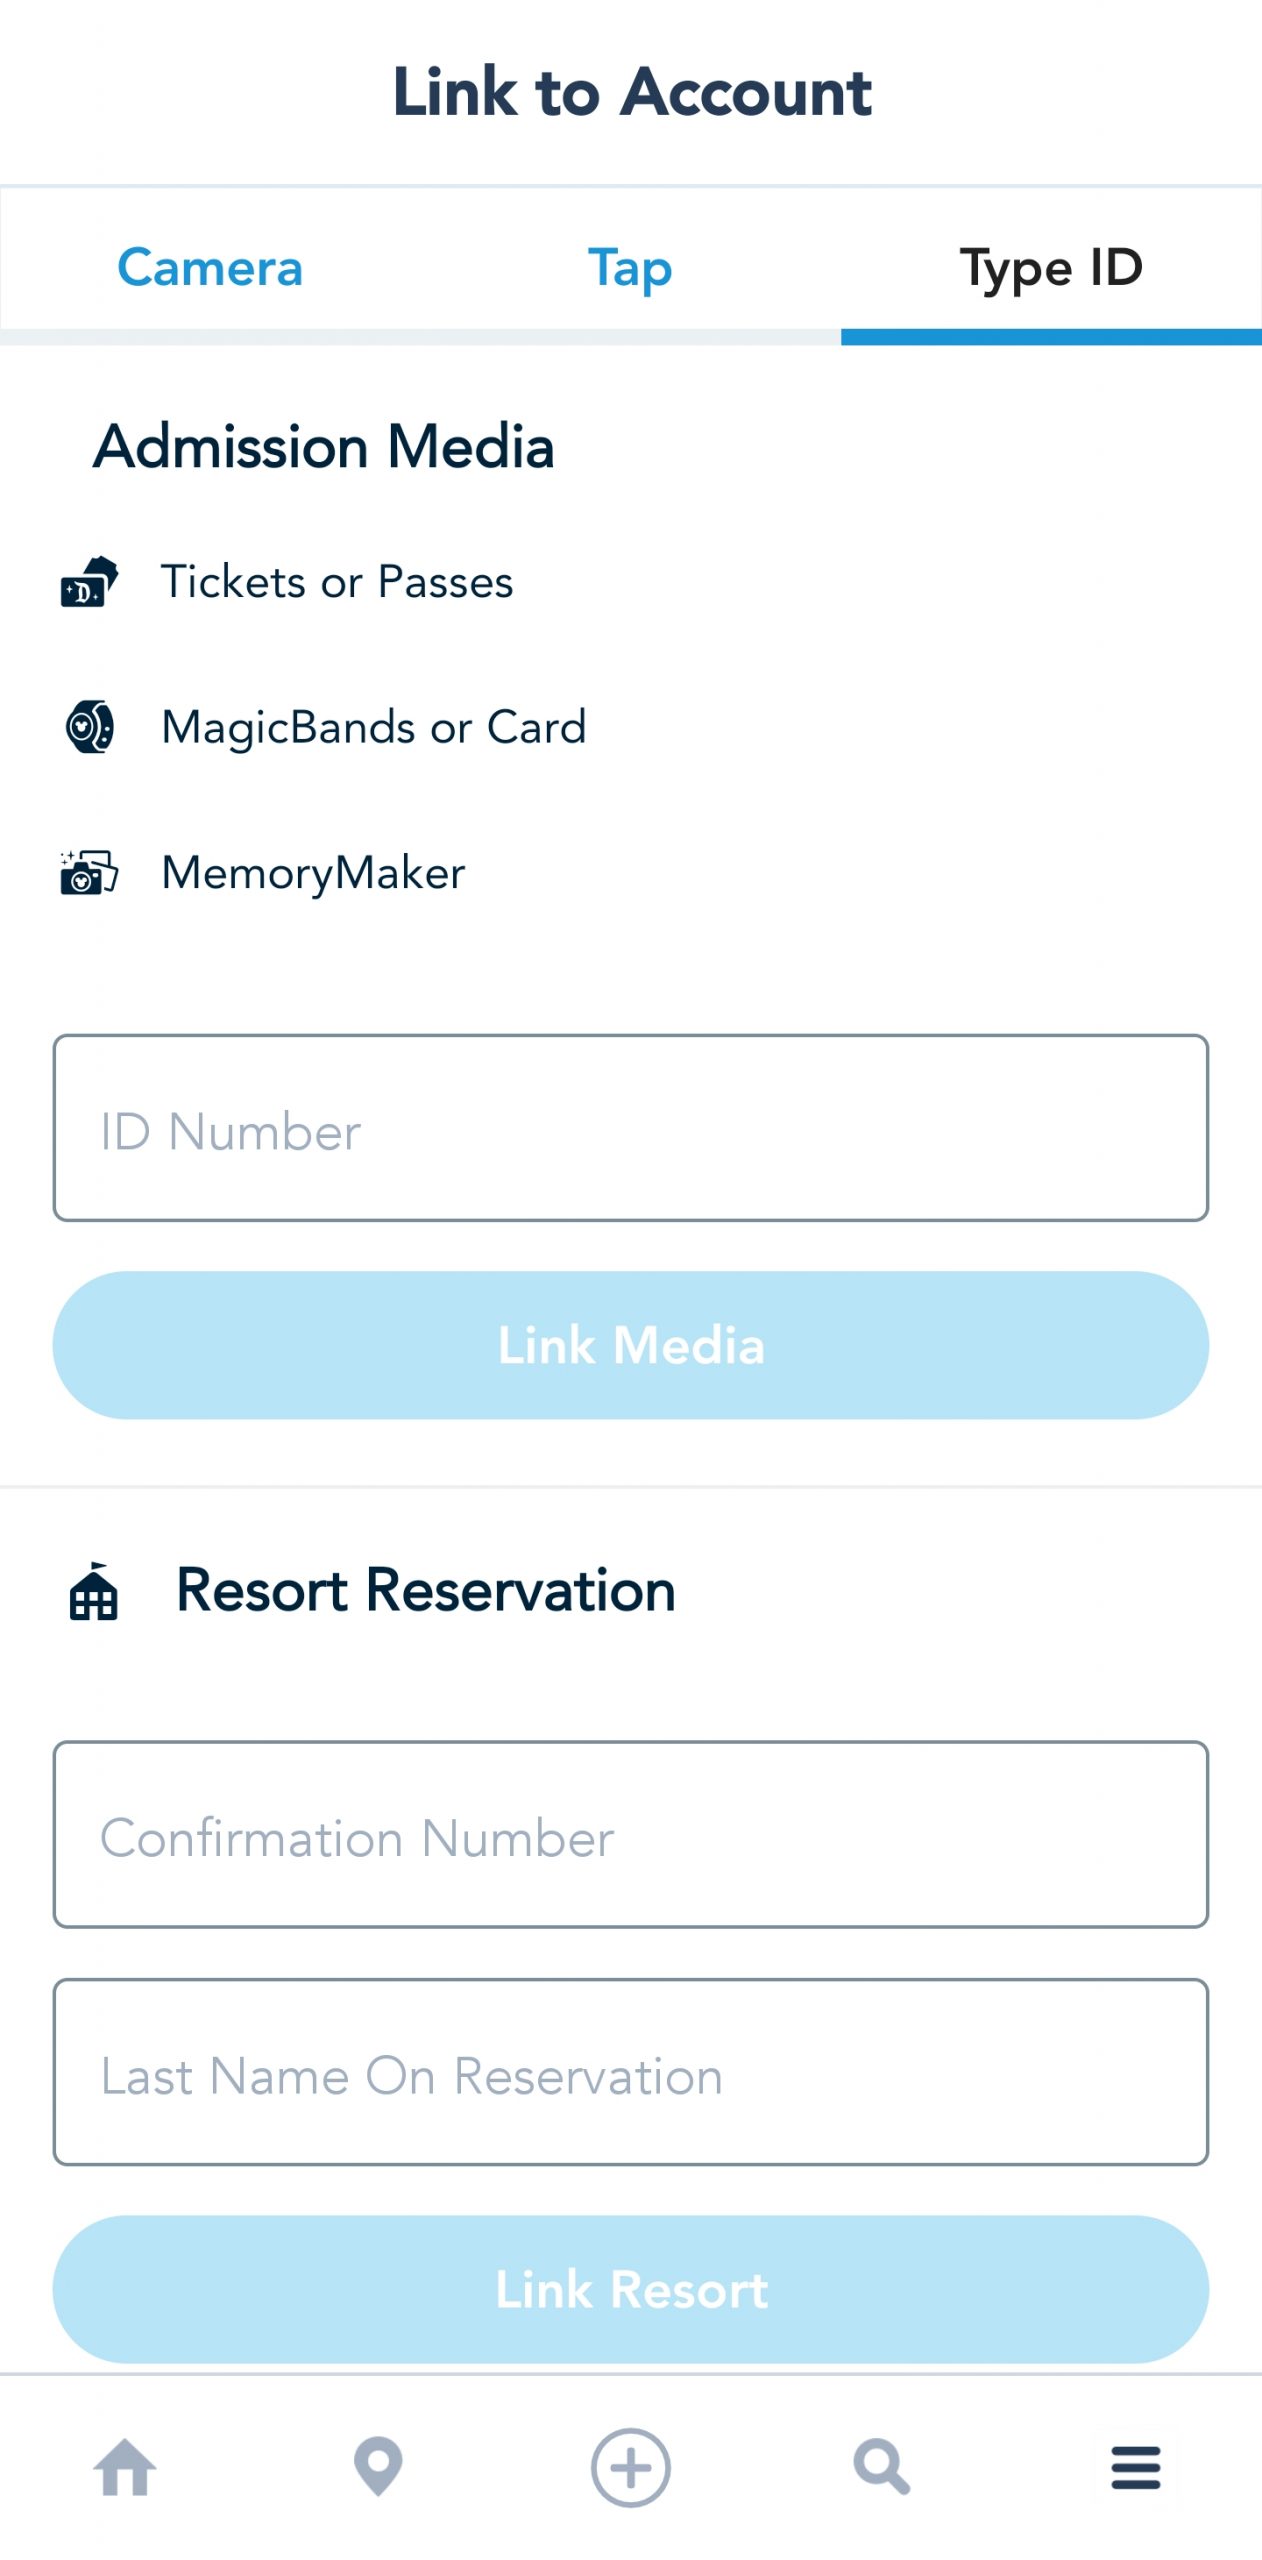
Type ID
If the other methods of linking your MagicBand+ are not successful, you can always type the unique ID number into the app. You will find this unique ID number on the back of your MagicBand+, just under the Disney logo.
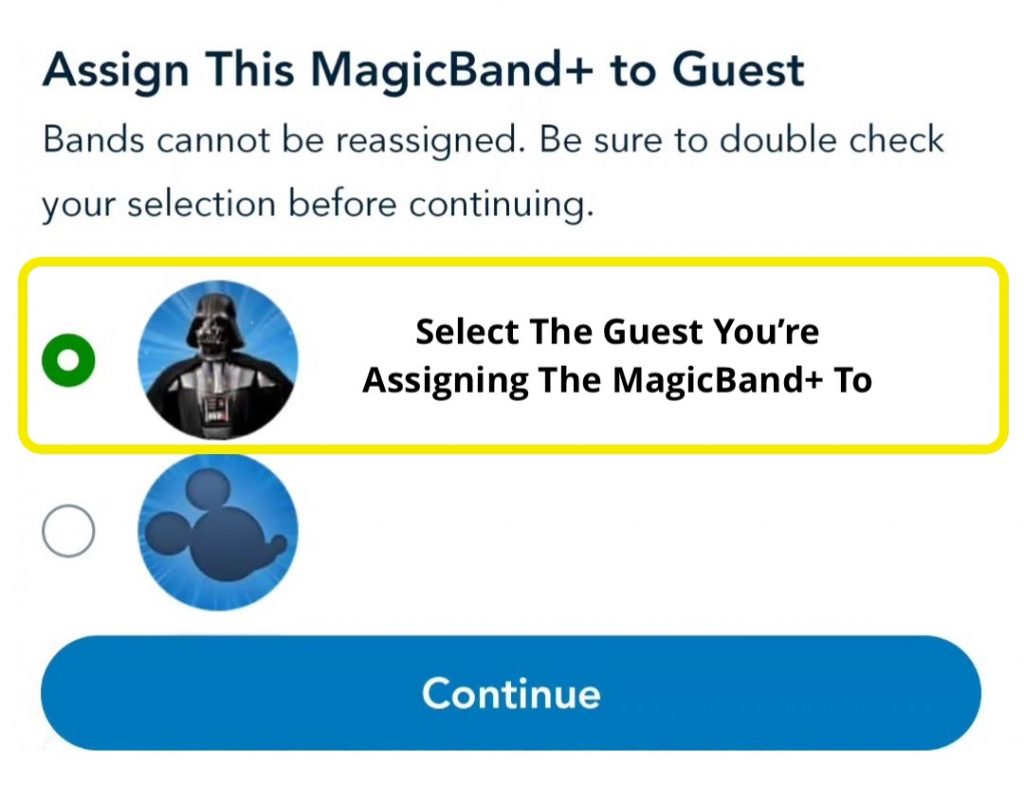
Select Who You Are Linking The MagicBand+ To
If you have multiple people in your Friends & Family list that allow you to manage their plans, you can assign the MagicBand+ to their profile. Be sure to double check who you have selected, as MagicBands can not be reassigned once they have been added to a person’s profile. Once you have selected who you’re assigning the MagicBand+ to, tap the blue “Continue” button at the bottom of the screen.
Pair Your MagicBand+ To Your Mobile Device
Now that you have assigned your MagicBand+ to the correct person, you will be prompted to link it to your mobile device.
If You’re Setting Up A Family Member’s Band That Has A Mobile Device
If you’re setting up a family member’s MagicBand+, and they do have their own mobile device, it would be best to have them pair the MagicBand+ to their personal mobile device.
If You’re Setting Up A Family Member’s Band That Does Not Have A Mobile Device
If you’re setting up a family member’s MagicBand+ for someone who does not have their own mobile device, you can either pair the band to your phone to ensure it’s kept up-to-date for any future software updates, or leave it unpaired over bluetooth.
The MagicBand+ will still light up and interact during select times or at select locations, even when it’s not paired over bluetooth with a mobile device, but you will not be able to get some of the visual feedback of achievements and actions that are shown on your phone’s screen.
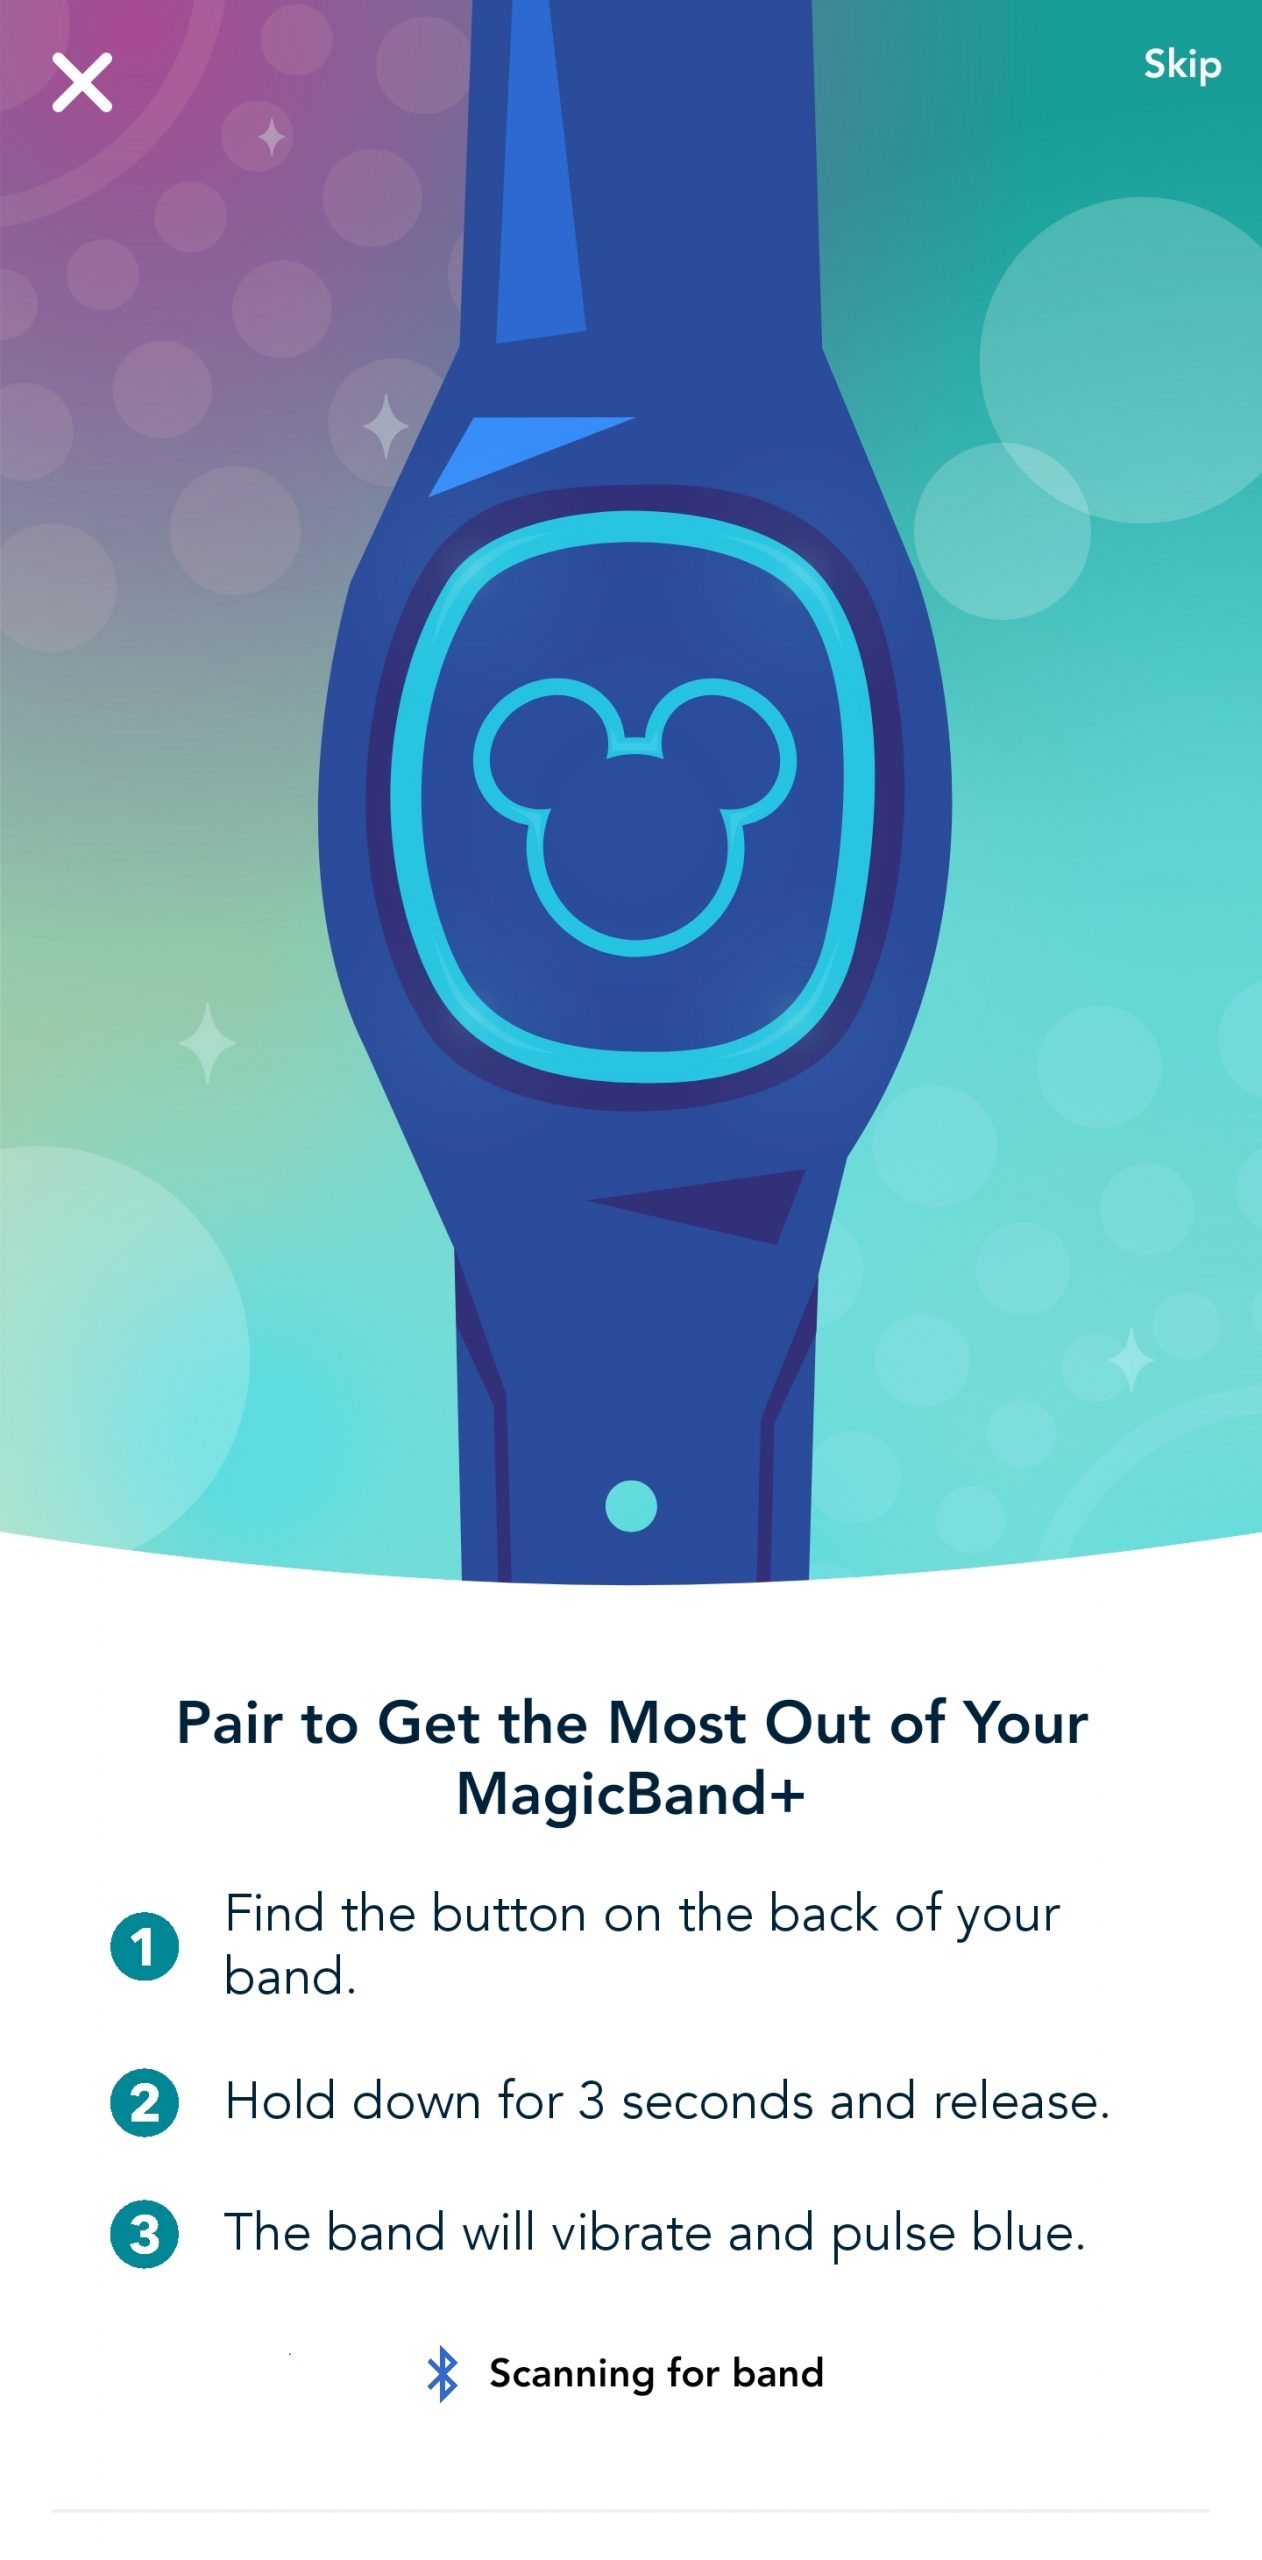
If You’re Setting Up Your Own MagicBand+
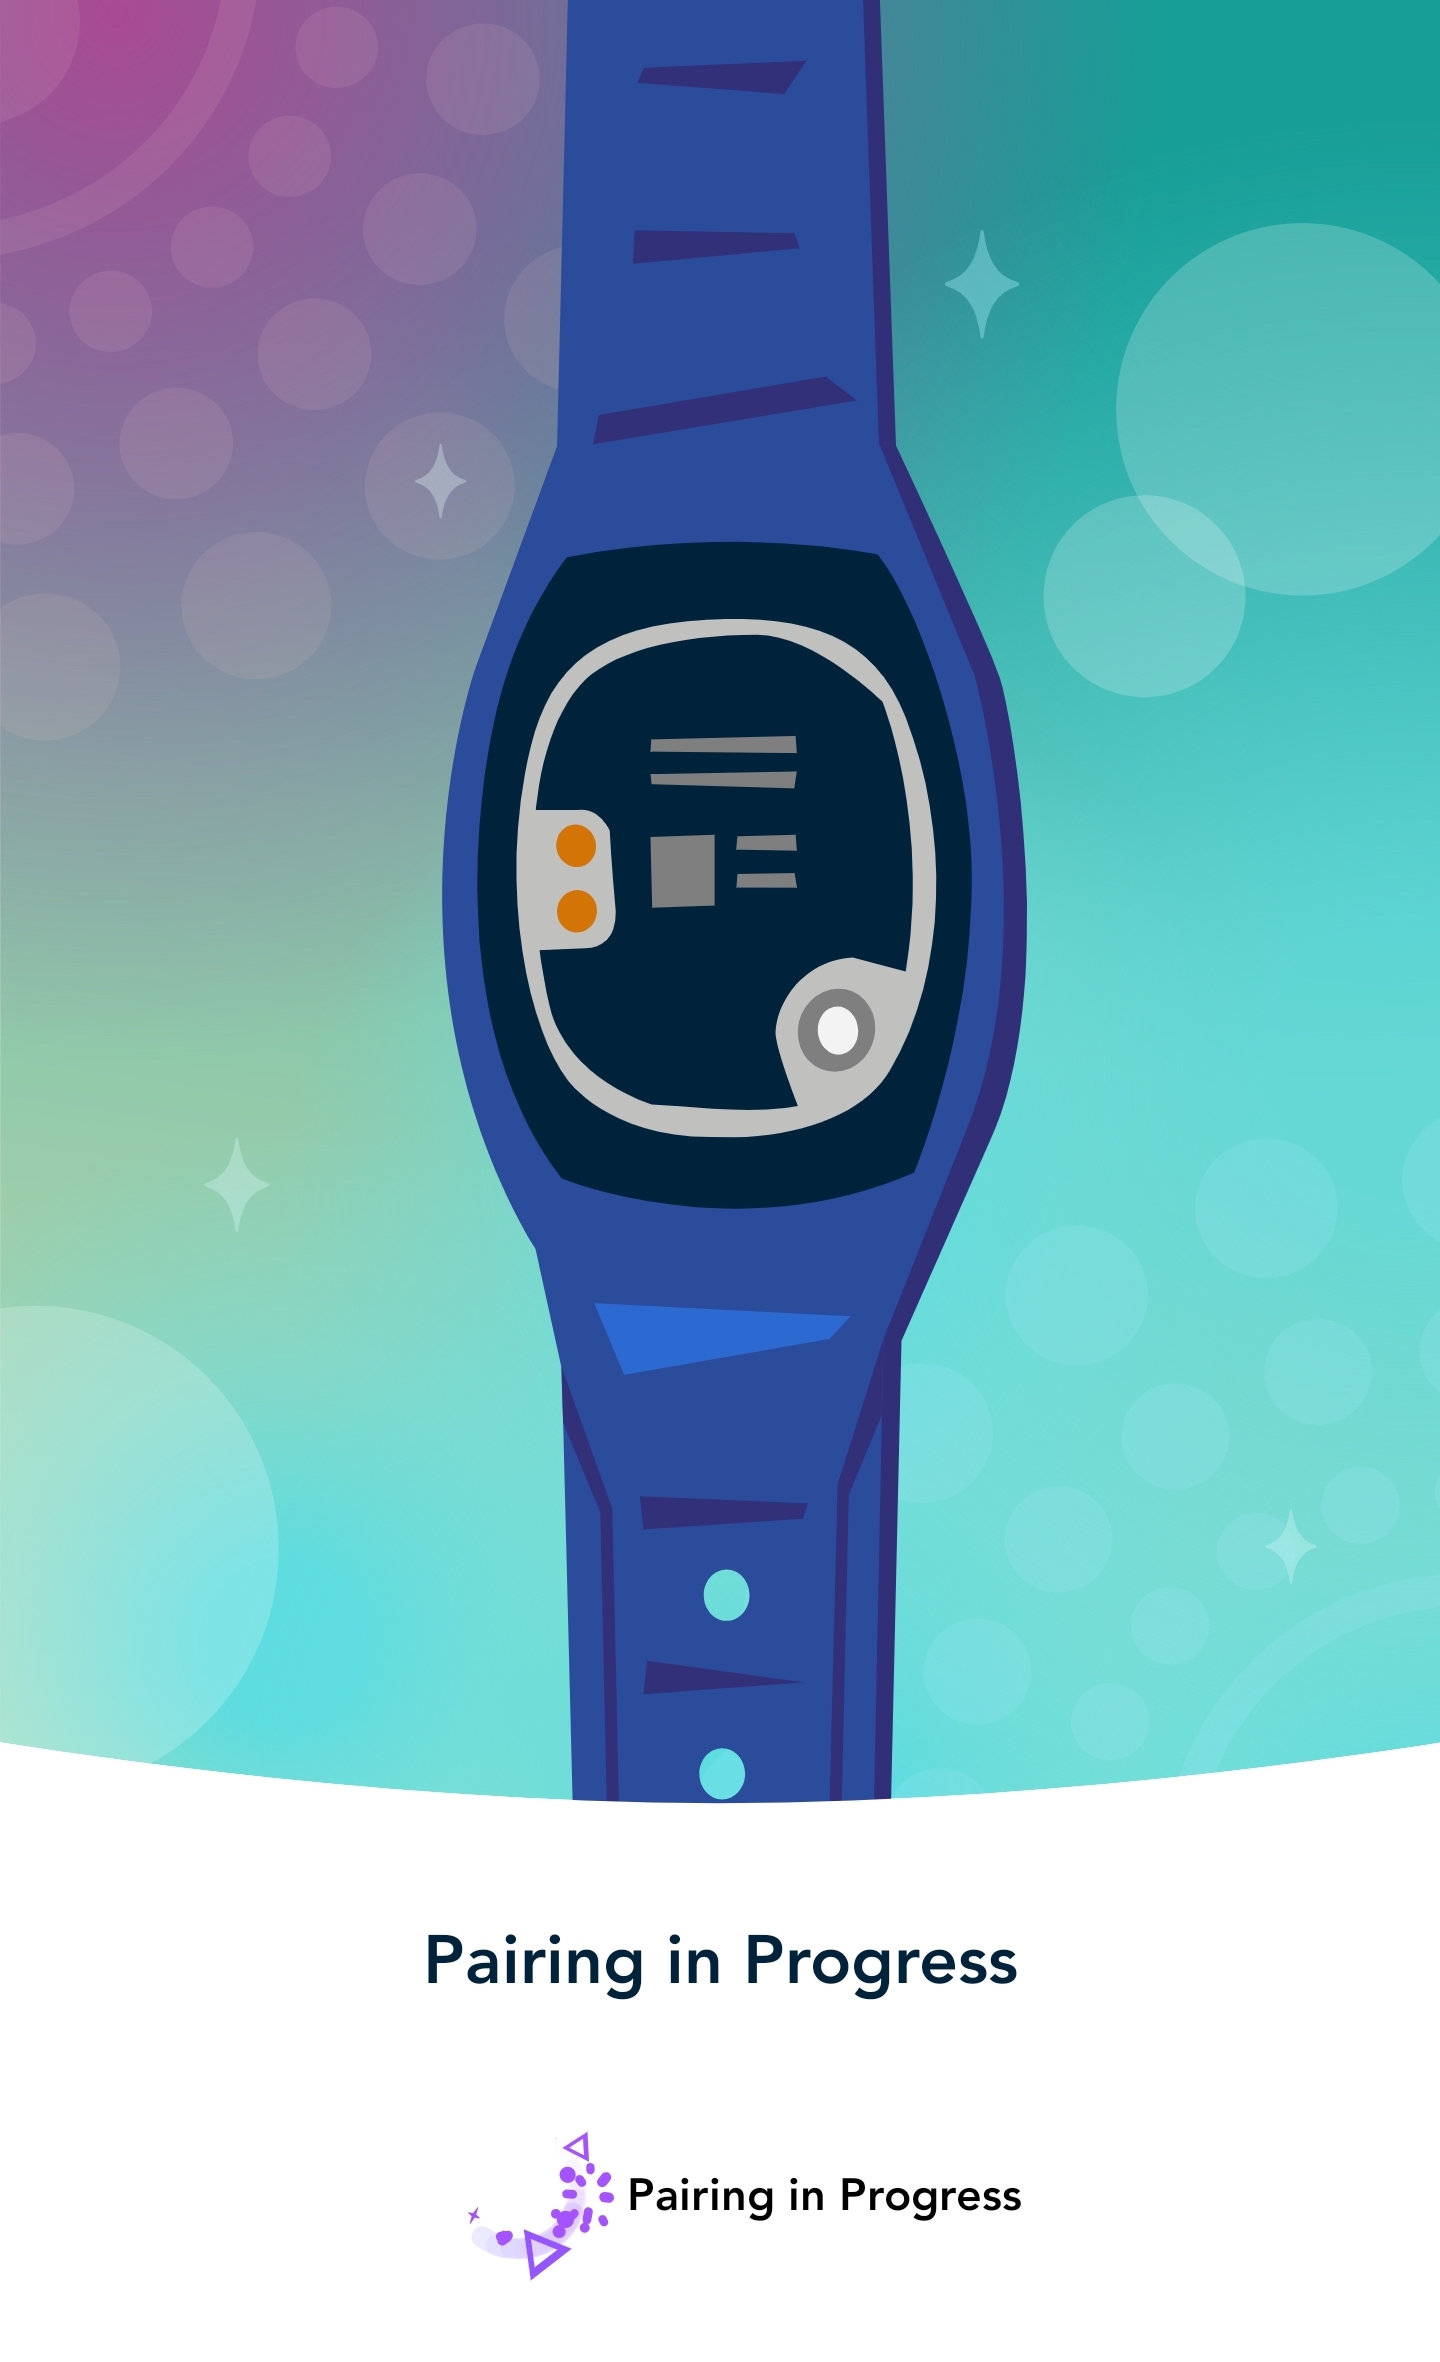
To pair your MagicBand+ to your mobile device, simply locate the small button on the back of your MagicBand+, hold it down for 3-4 seconds, then release the button. You will feel a vibration, and the front of the band will display a blue color when successfully paired.
The image below depicts the back of the MagicBand+. You can find the pairing button on the lower left-hand corner of the back of the device.
Make Sure Your MagicBand+ Is Fully Updated
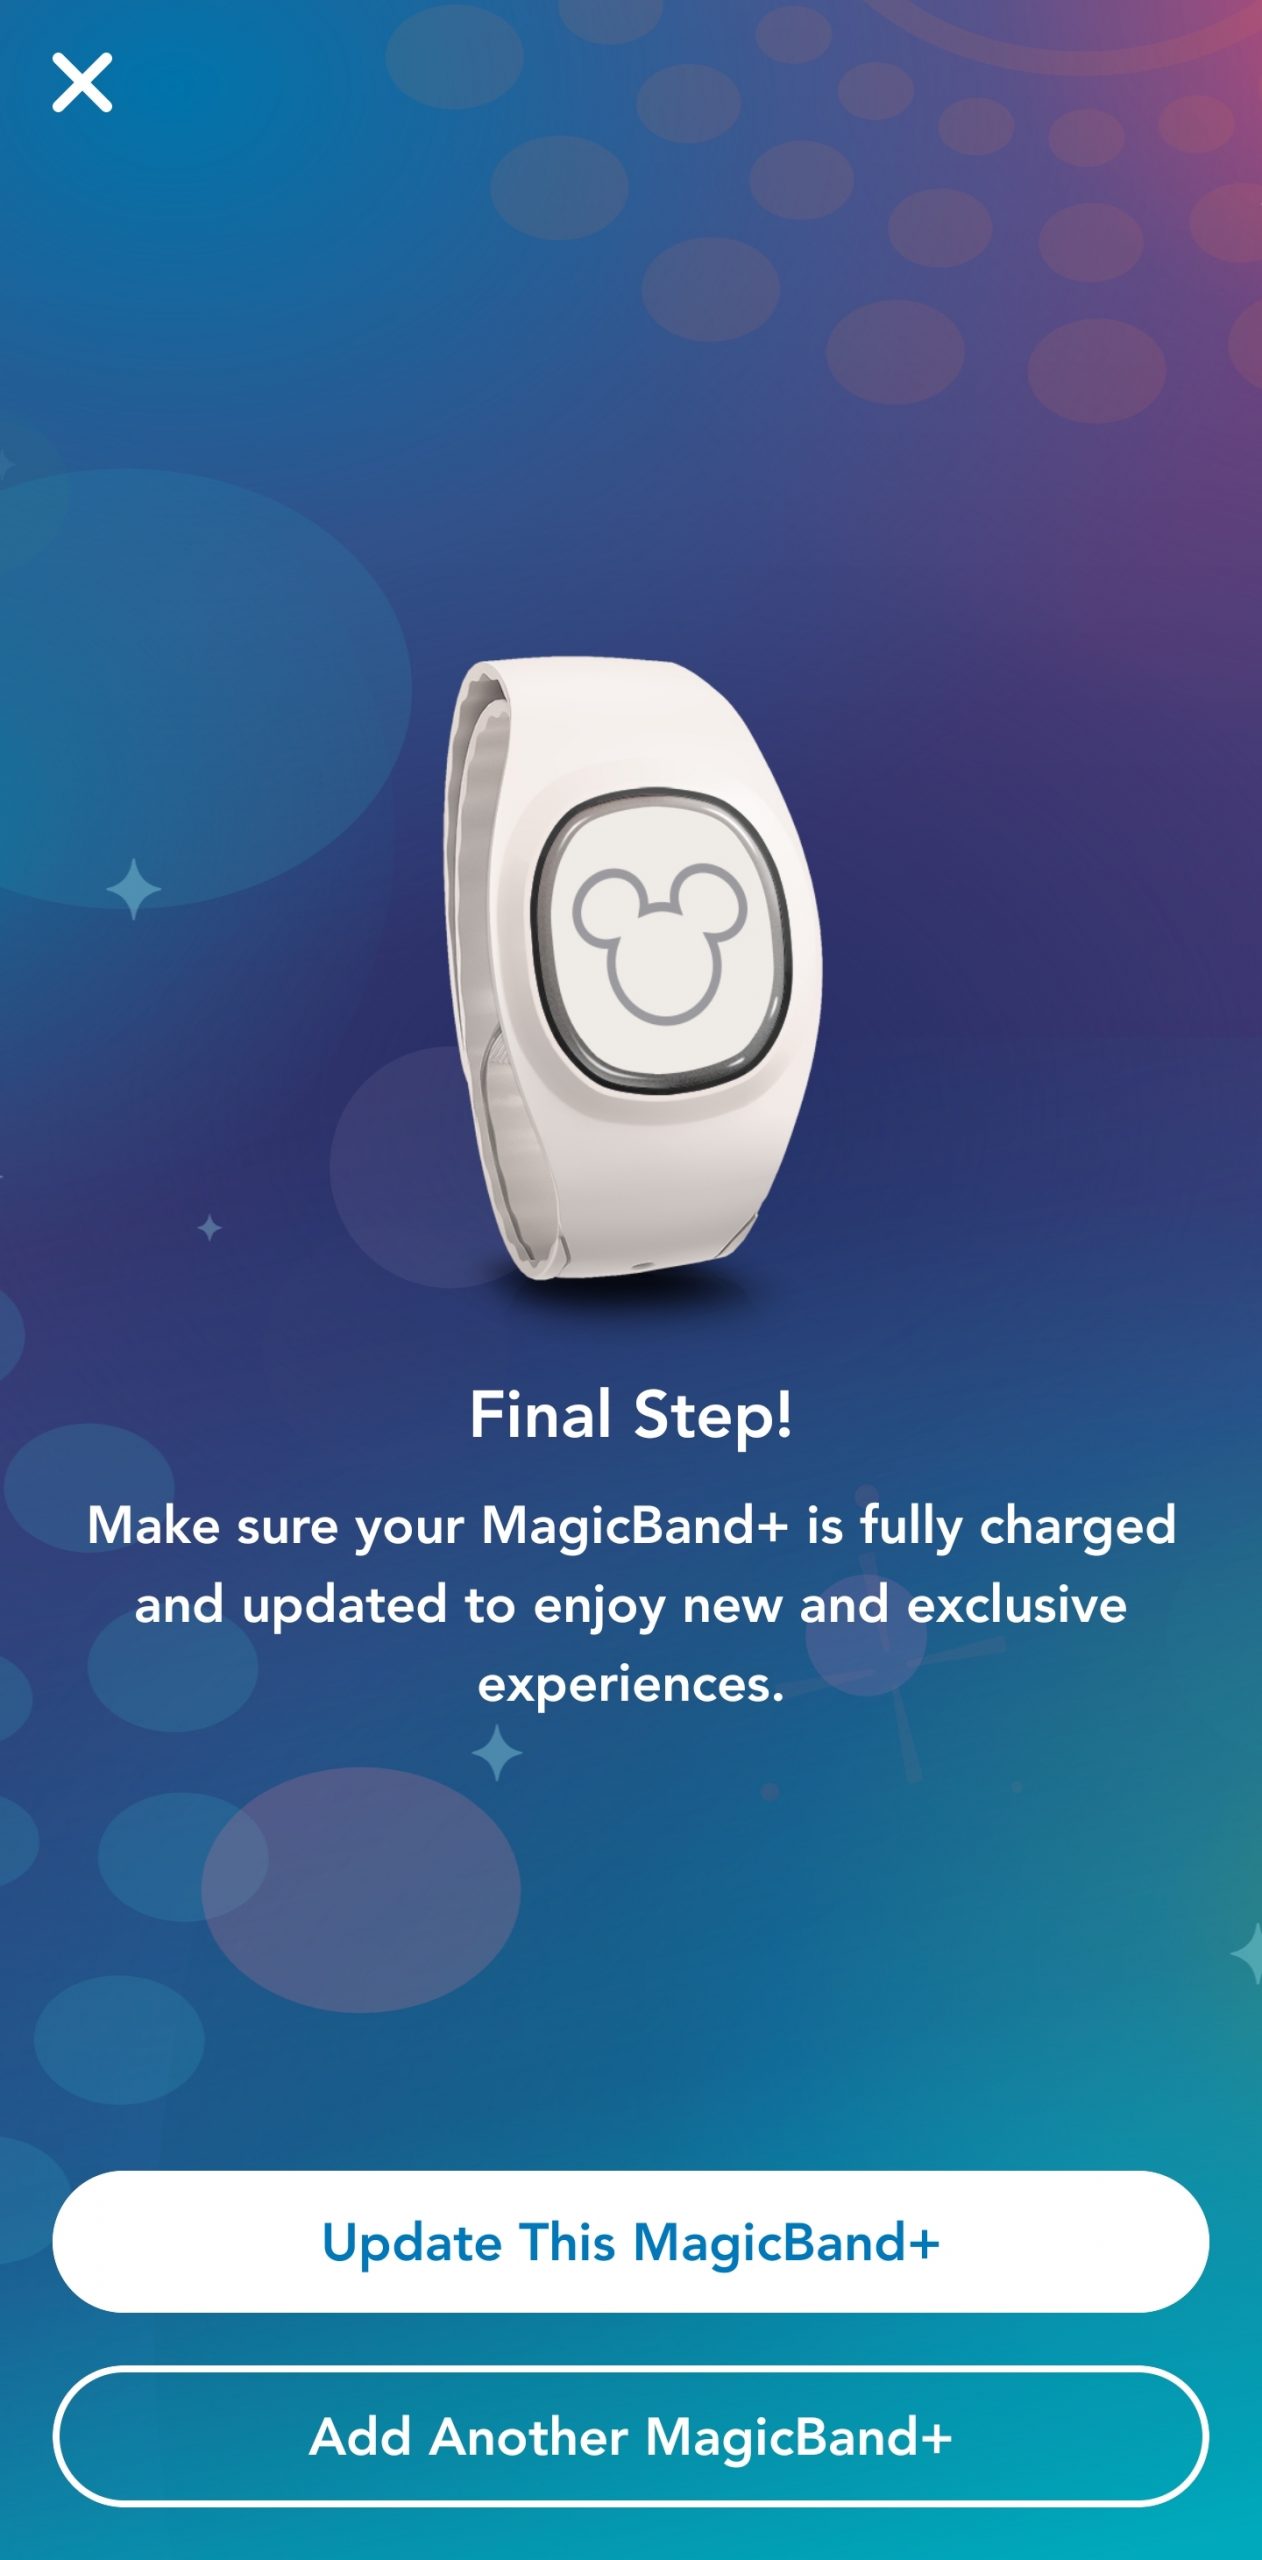
Once you have successfully paired your MagicBand+, you will be prompted to ensure it is fully charged as well as its software is up to date. We had an update for the band waiting for us, which can be completed by tapping the “Update This MagicBand+” button near the bottom of the screen. The process to update the band took just a minute, and will most likely ensure you have a smooth experience when using your MagicBand+ inside the Disney World theme parks.
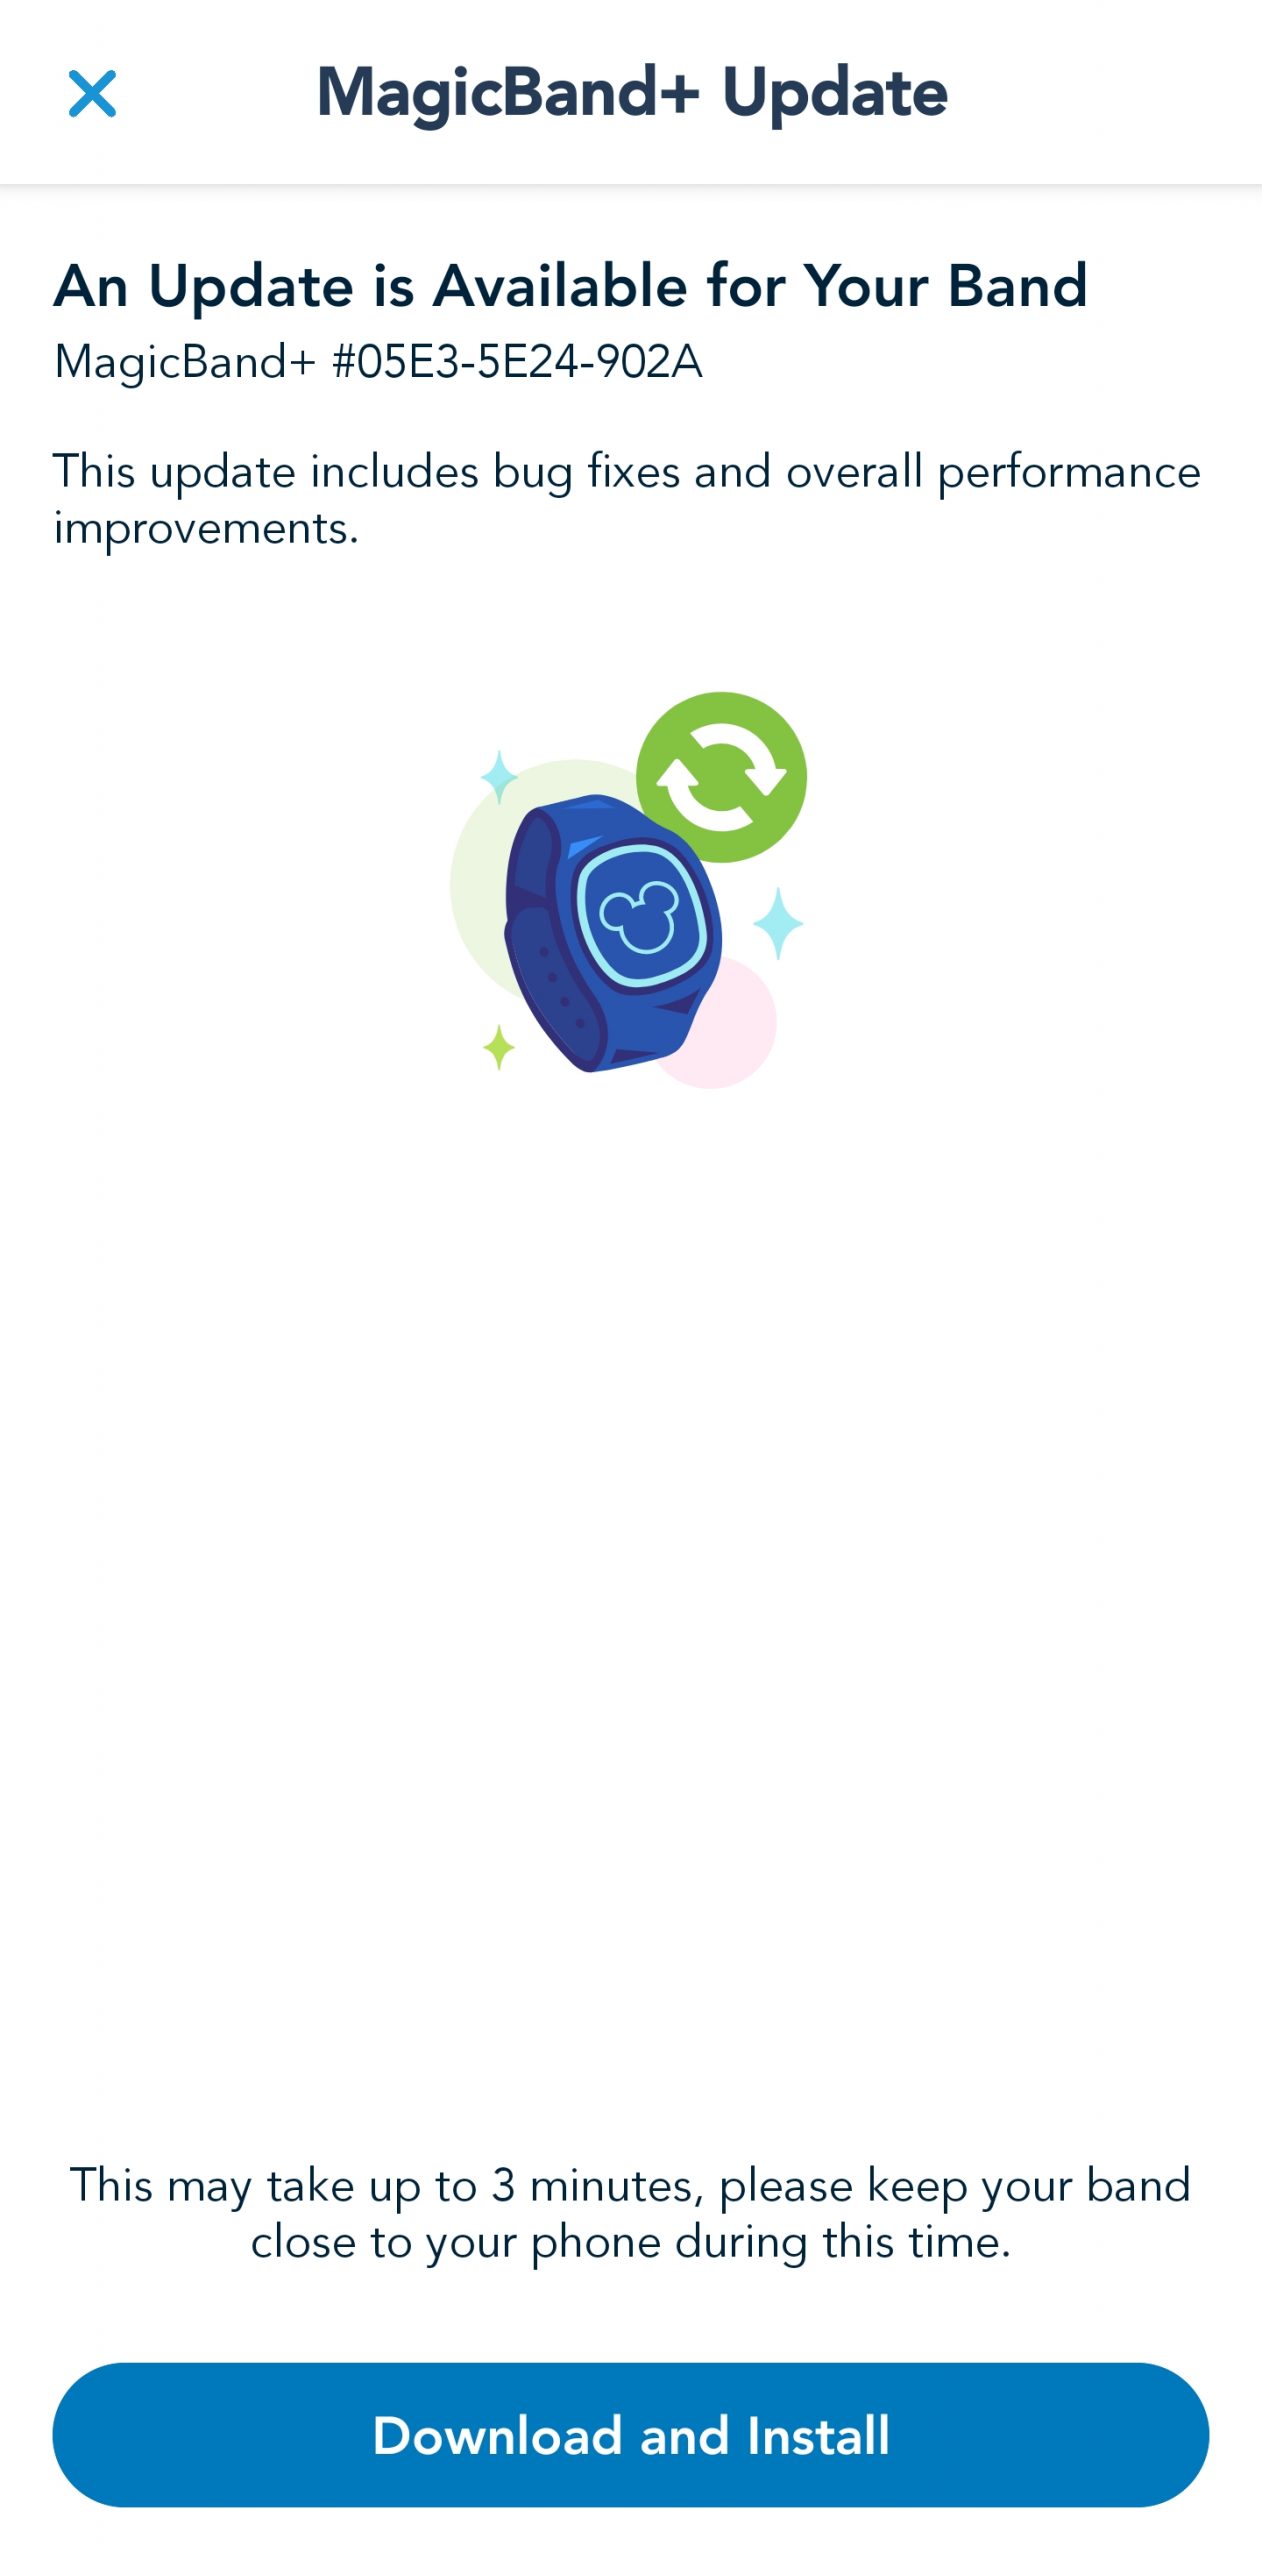
Once you’re at the update page, you can simply tap the blue “Download and Install” button to begin the update process.
Optional Steps To Customize Your MagicBand+
Change Your Light-Up Theme
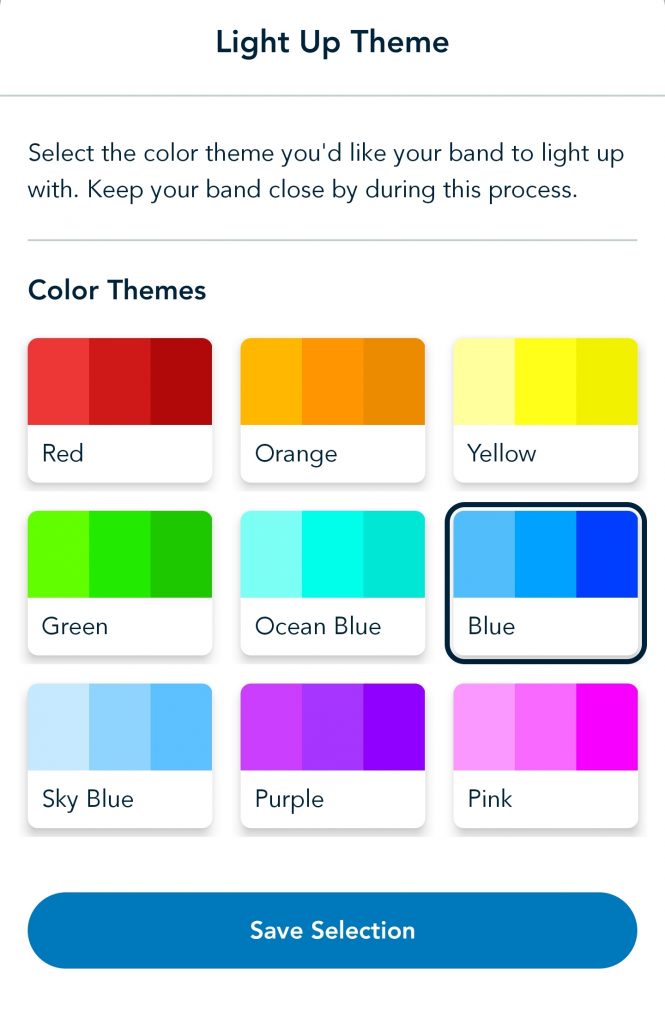
You can optionally change your light-up theme by tapping the “Change Color” button next to the Light Up Theme section on the “Your MagicBands and More” page.
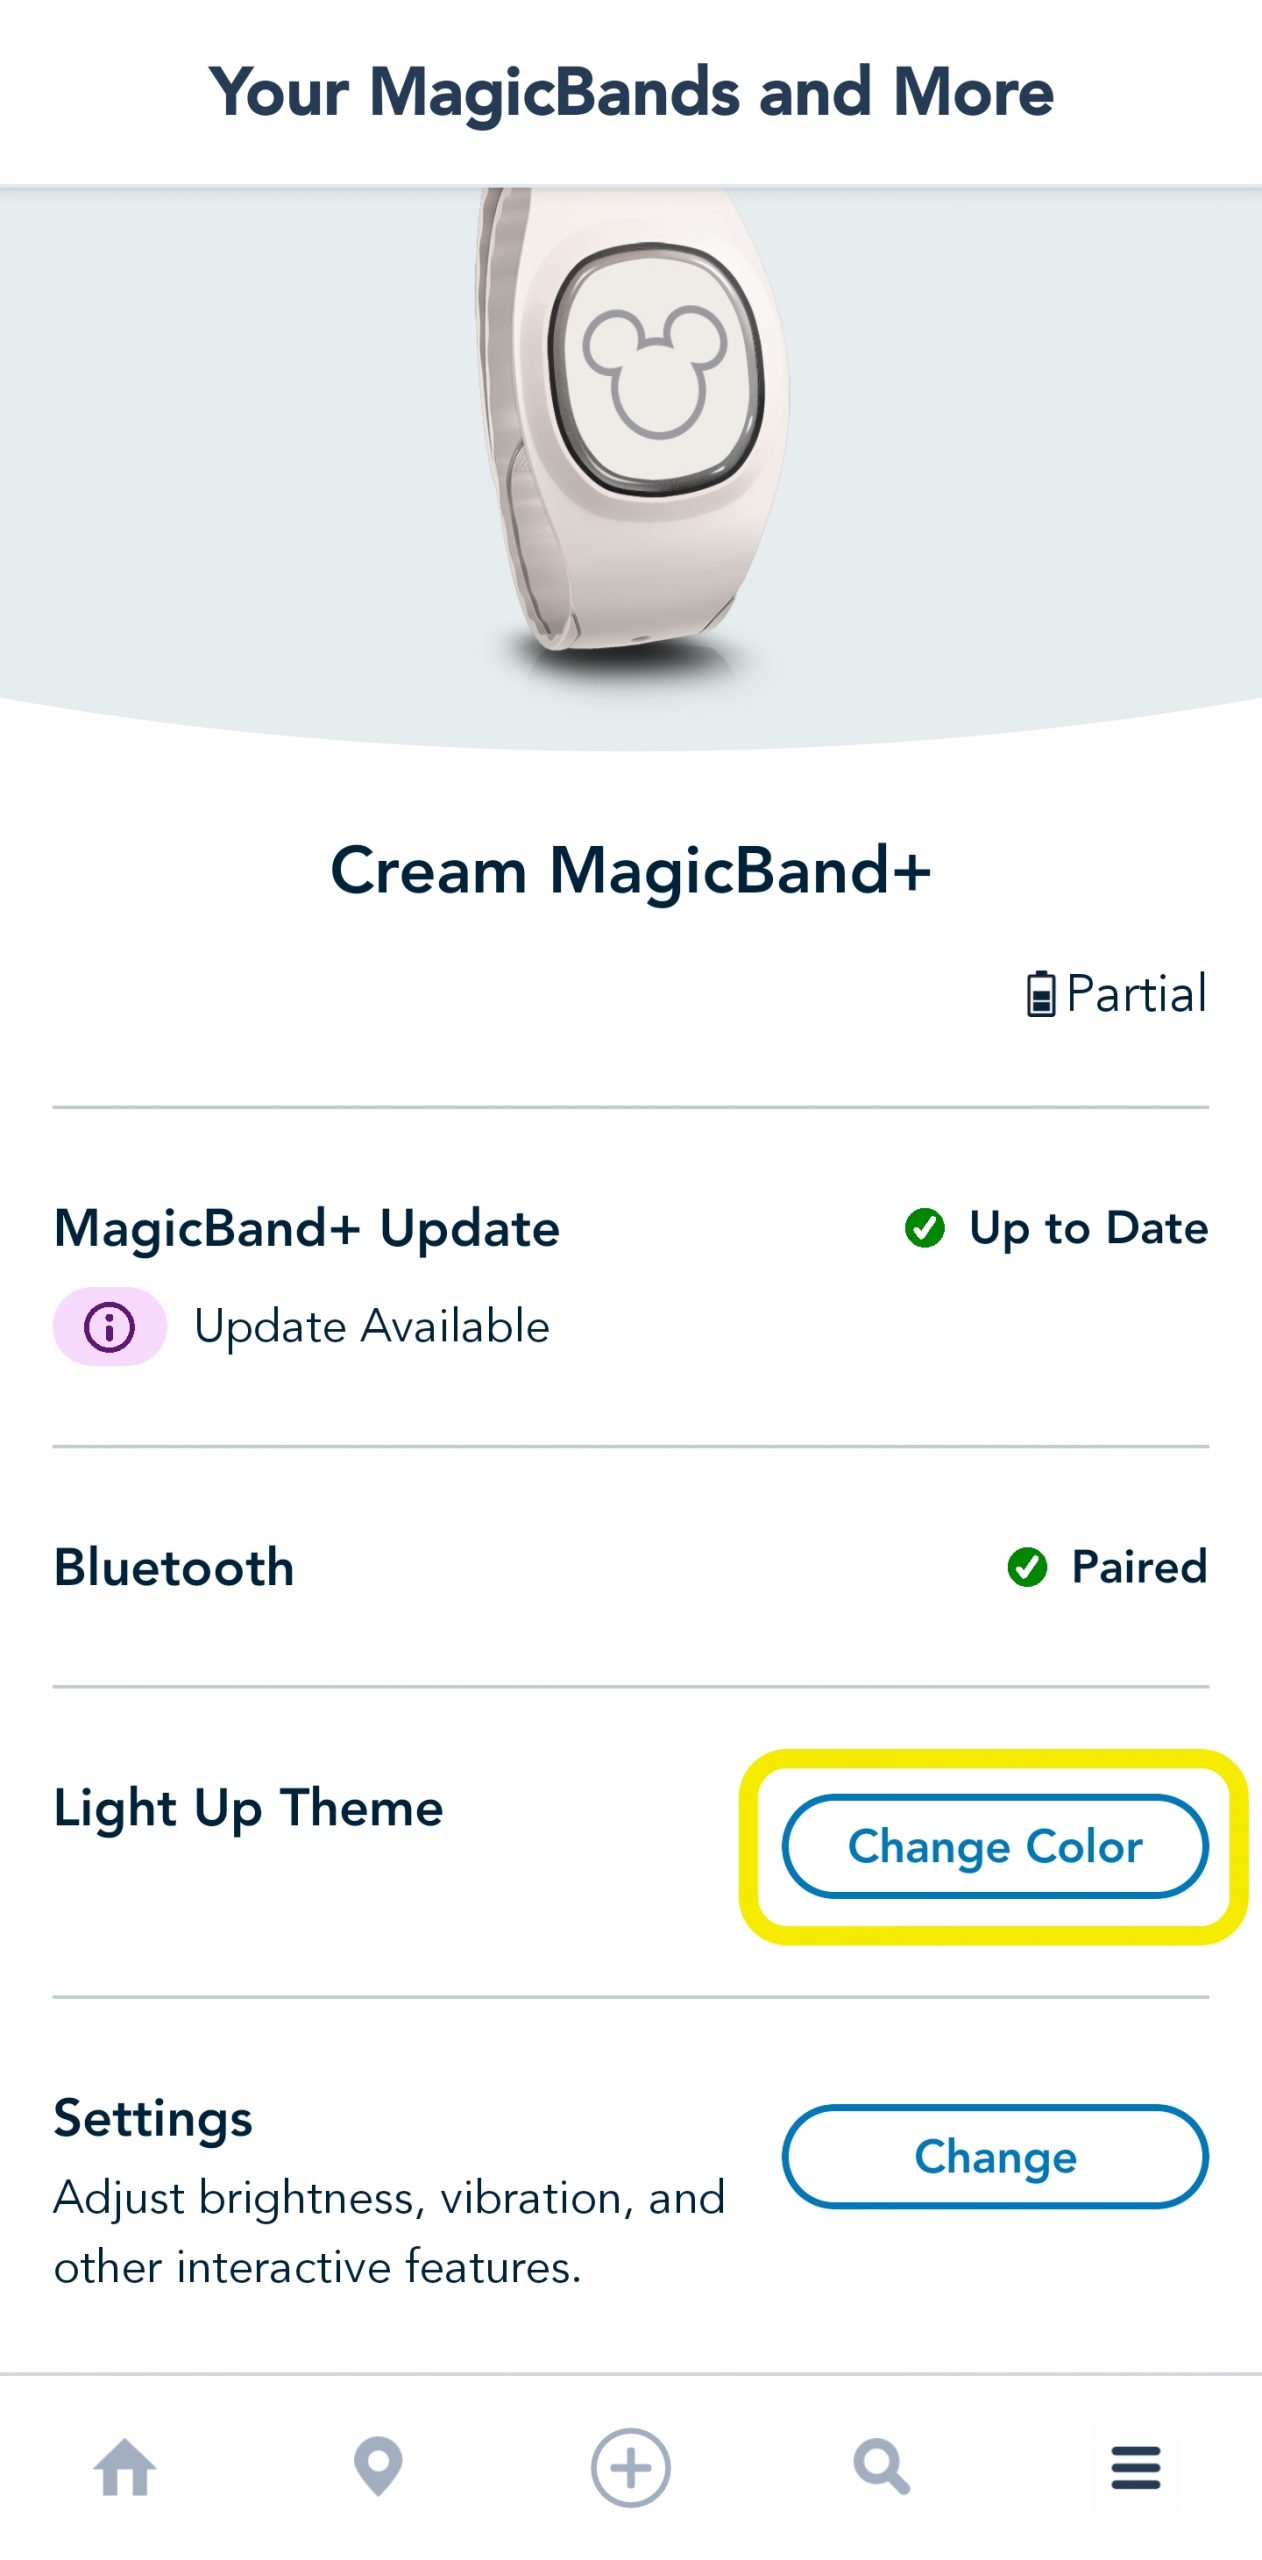
After you tap the “Change Color” button, you can select from a handful of color themes.
Change Your MagicBand+ Settings
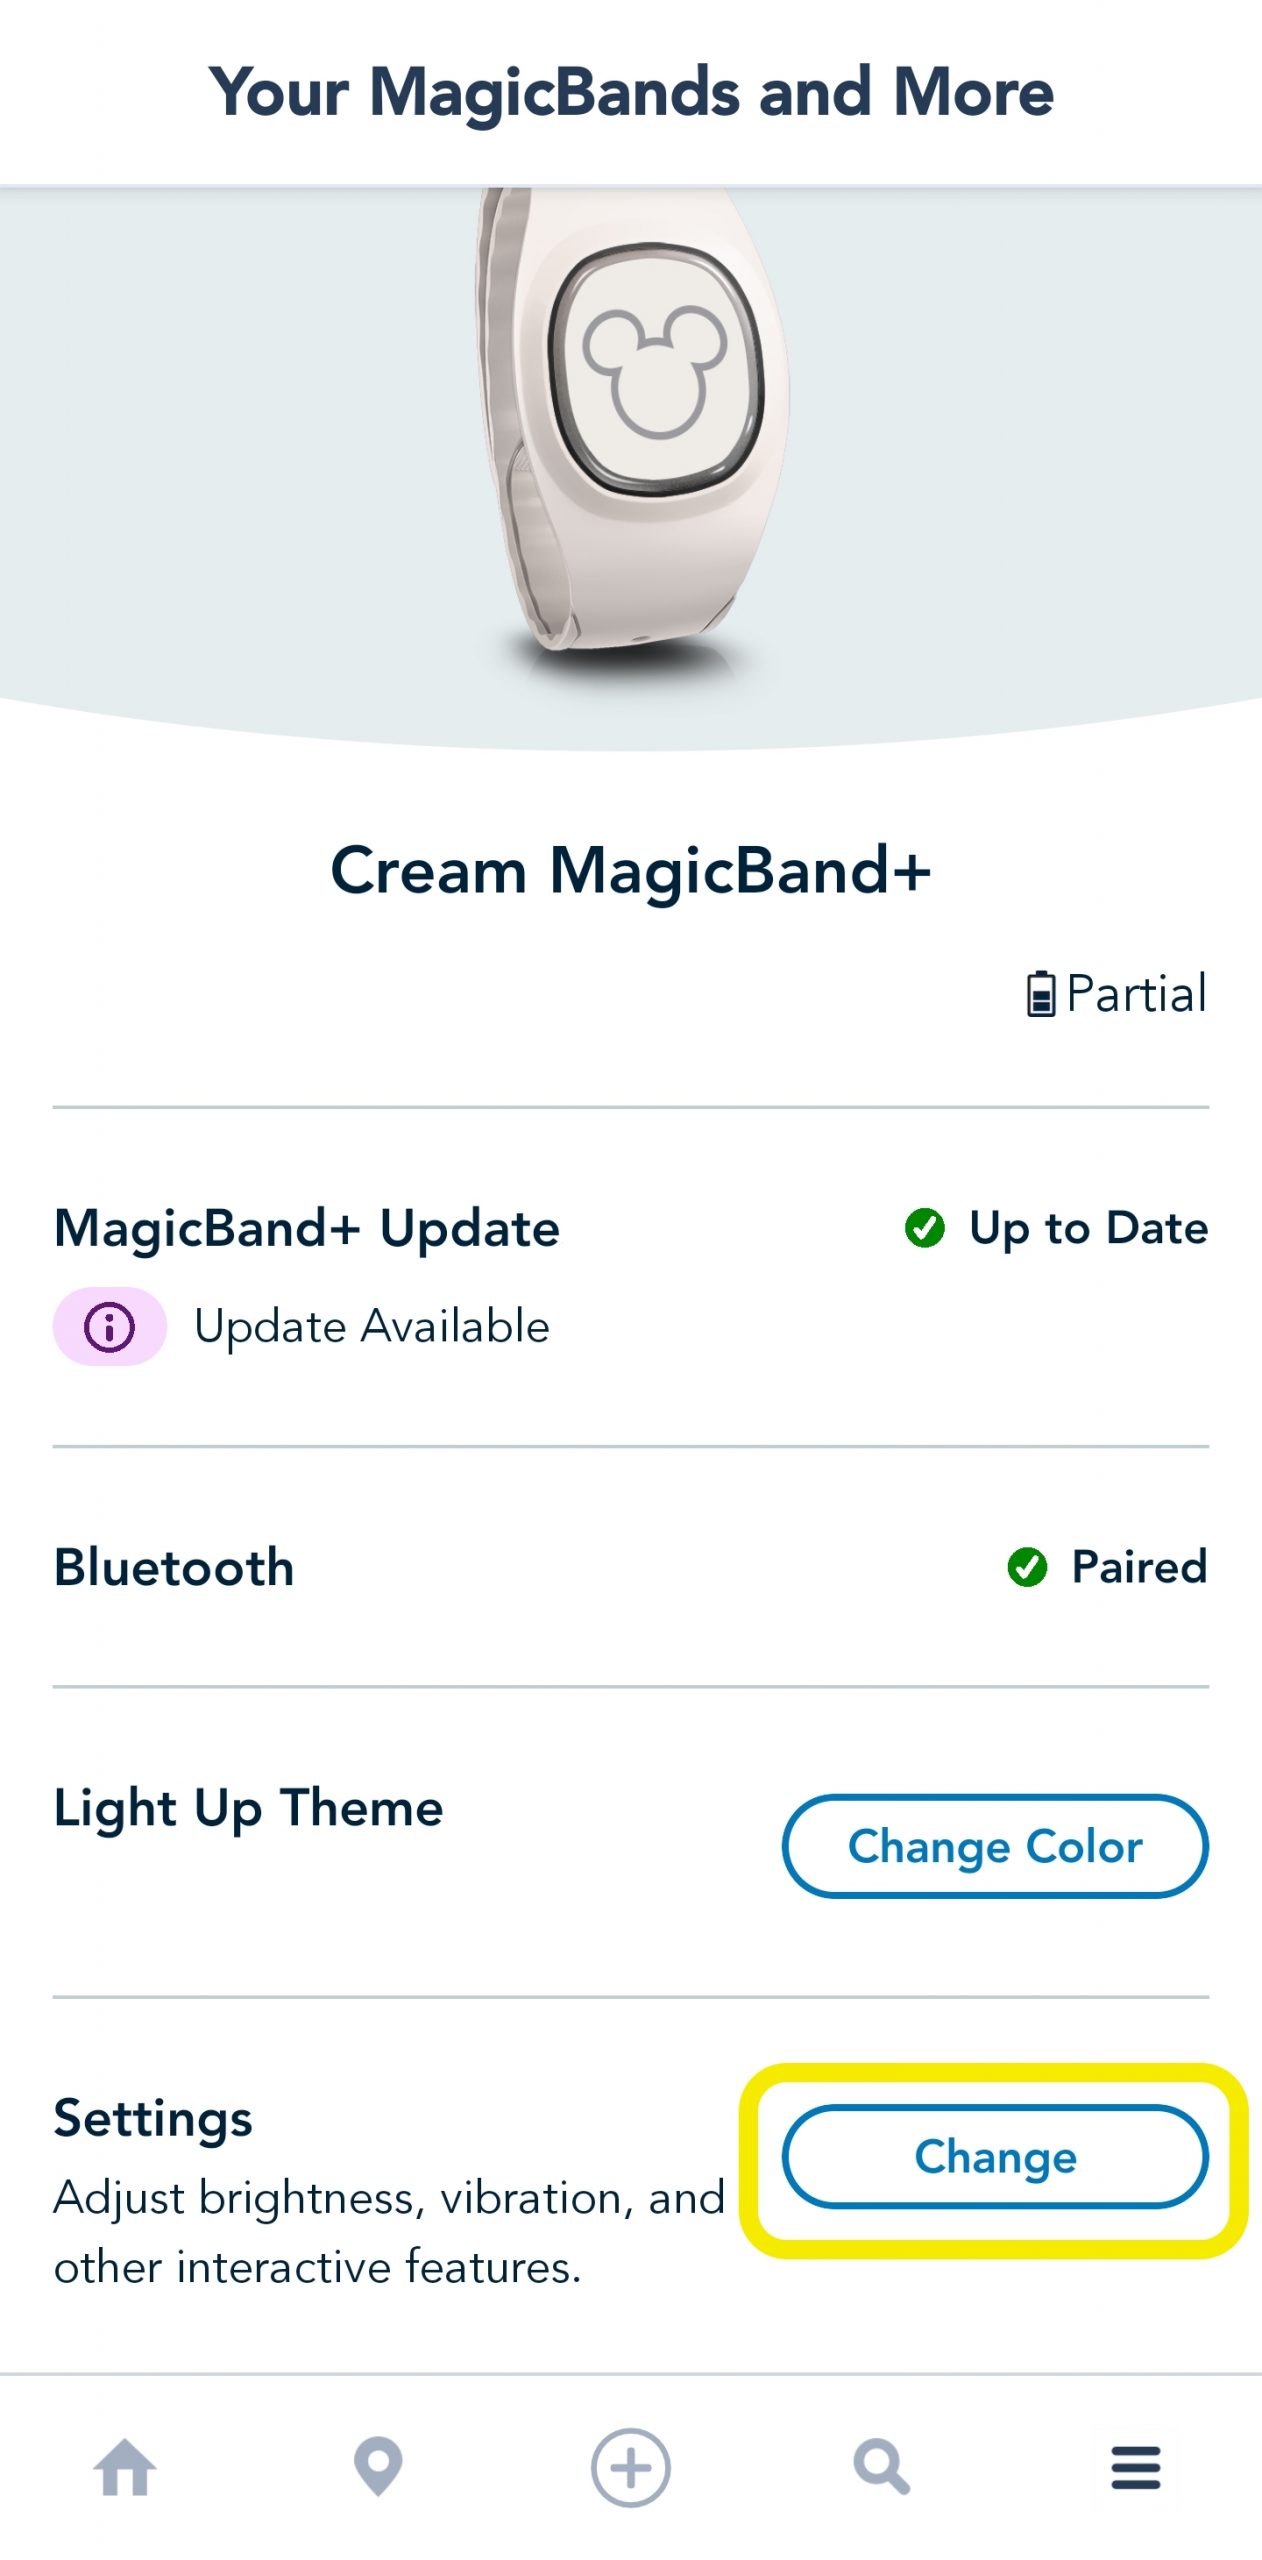
If you’re a bit of a tinkerer, you can optionally adjust your band’s appearance and how it interacts with certain experiences around the Disney World theme parks. Tap the “Change” button next to the Settings section on the “Your MagicBands and More” page.
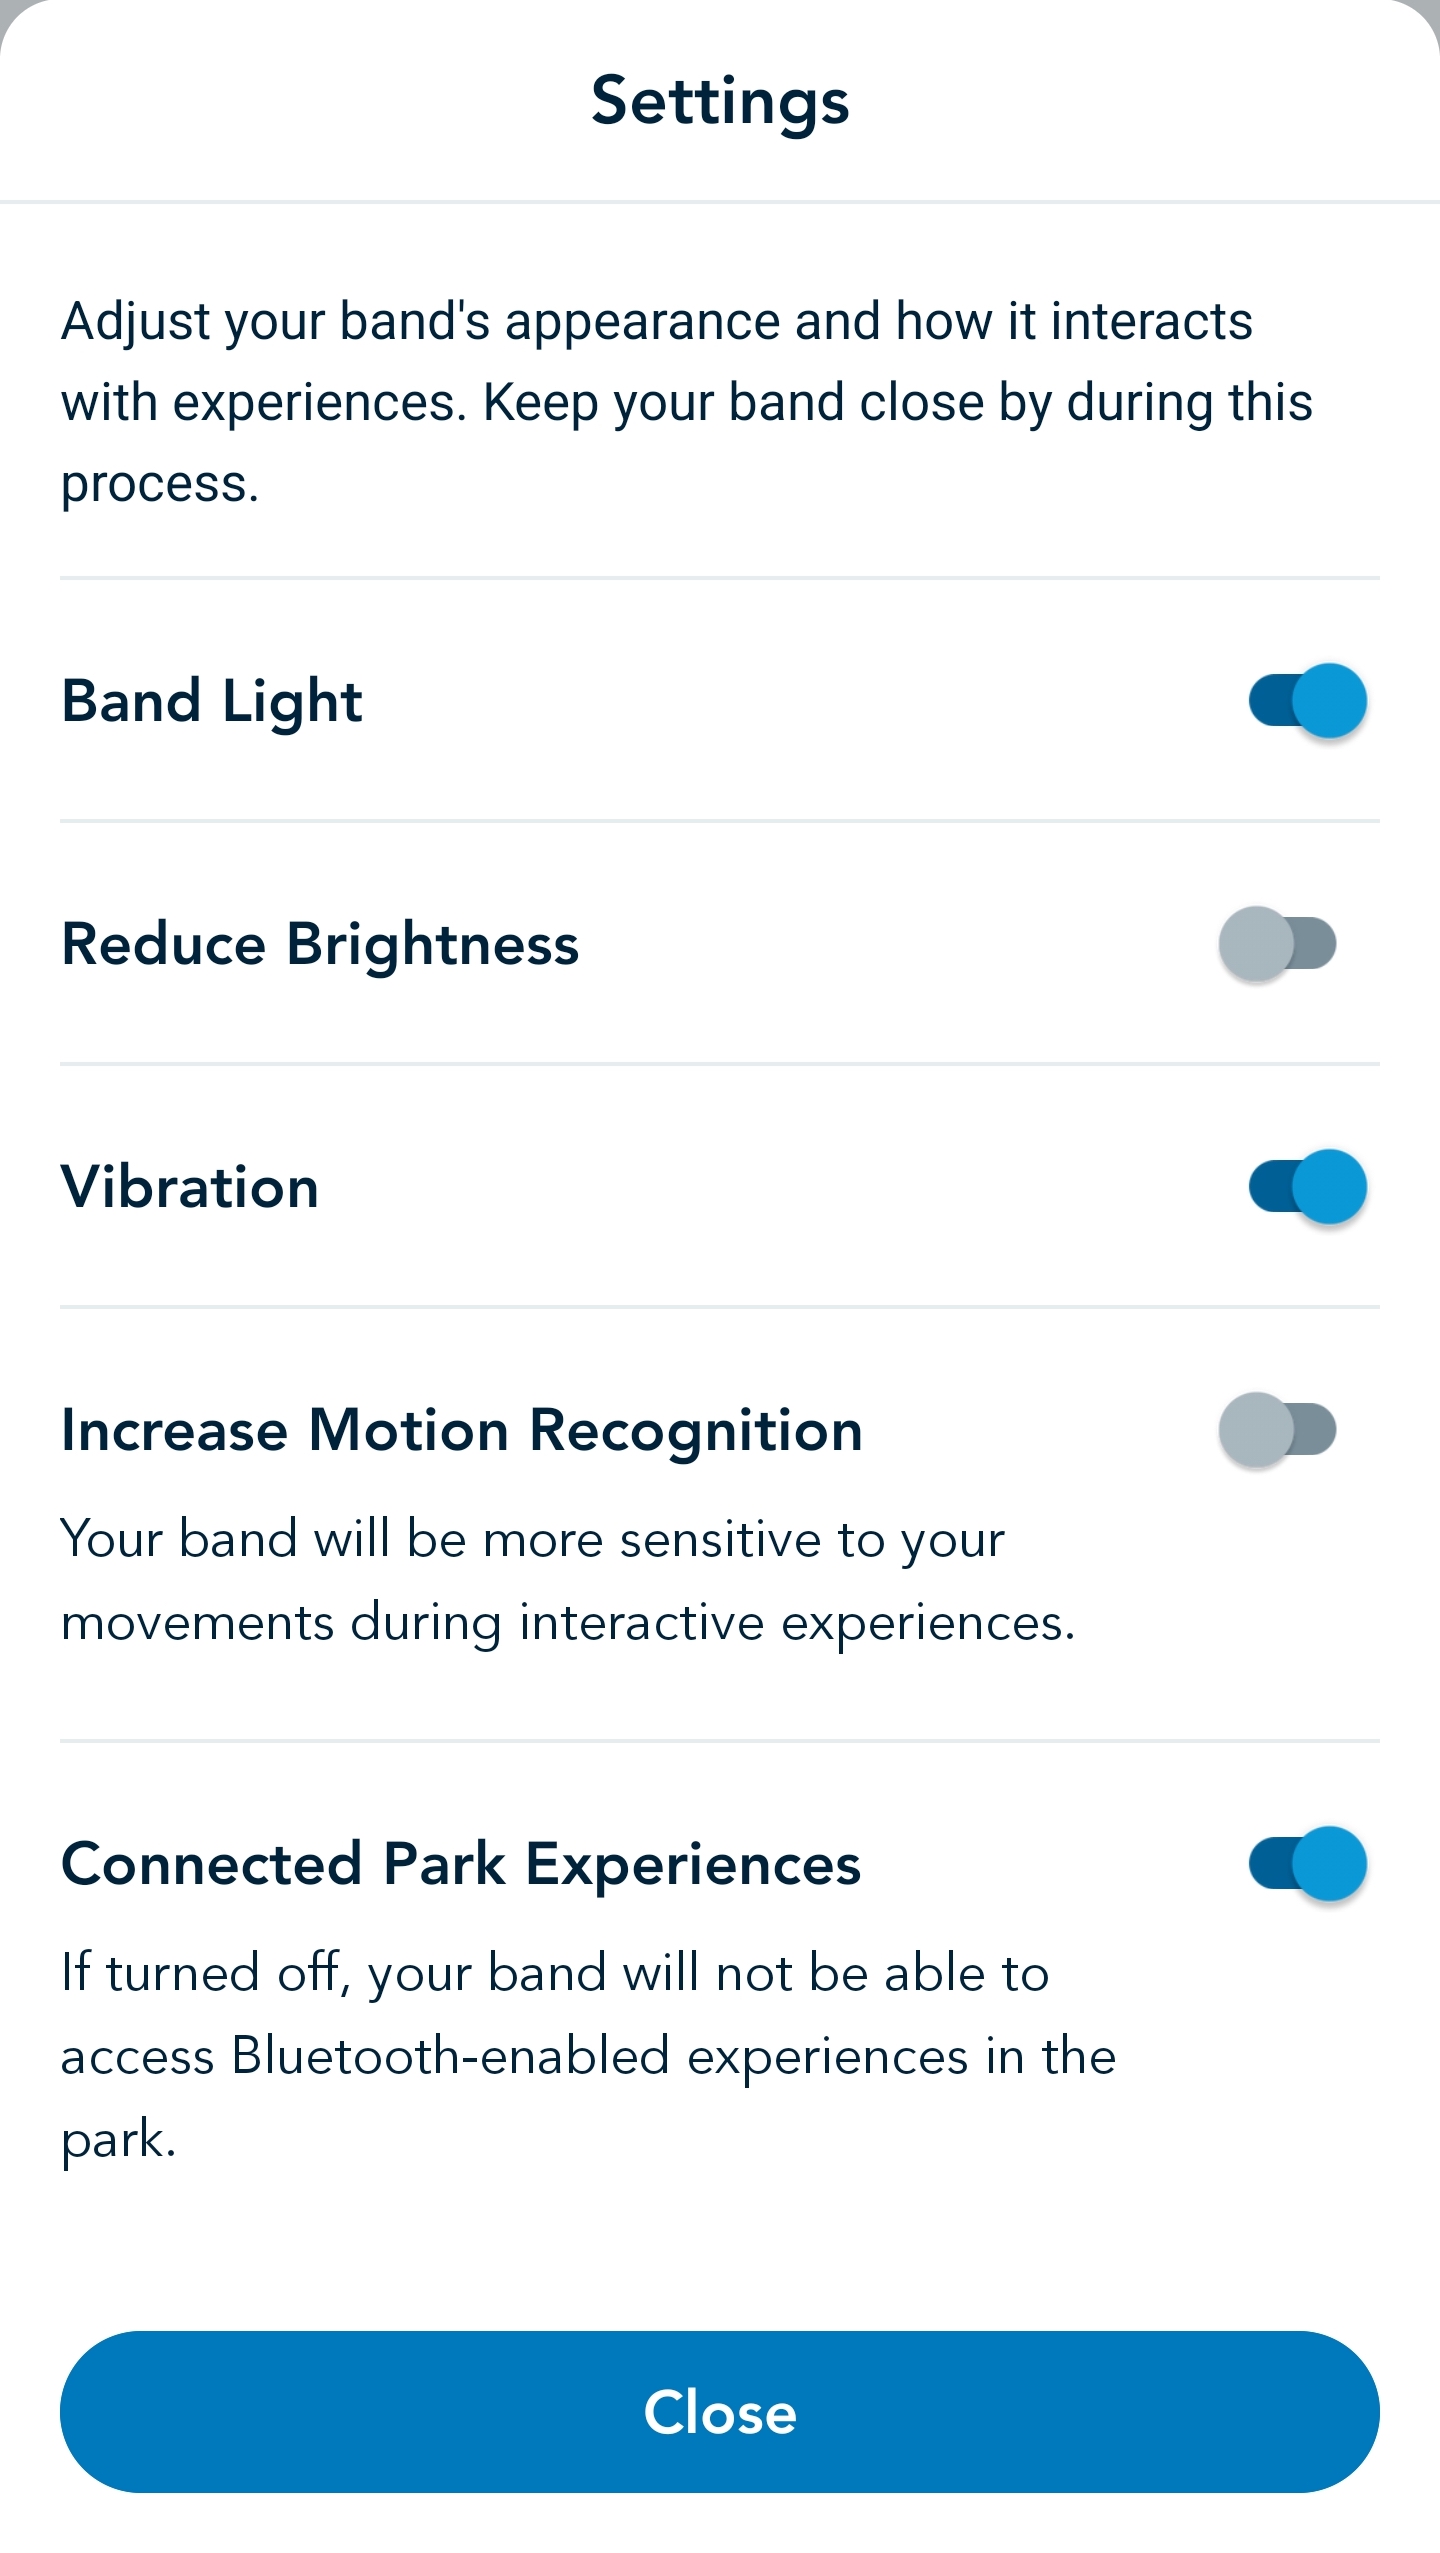
After you tap the “Change” button, you can customize settings such as turning off the band’s light, reducing the brightness, turning off vibration, increasing motion recognition, and toggling connected park experiences on and off. Keep your band close by during this process as your settings will be updated over bluetooth.
And that’s it! You’ve now successfully linked your MagicBand+ with the My Disney Experience app and paired it over bluetooth with your mobile device.
We hope you’ve found our step-by-step guide helpful. Now you can use your MagicBand+ to do everything from making purchases and unlocking your hotel room door, if you’re staying at a Disney Resort Hotel, to playing the new Batuu Bounty Hunters game and watching it light up during the fireworks. We hope you enjoy using your MagicBand+ on your next Disney vacation!
Are you excited to start playing with the new features of your MagicBand+? What color / character combo did you get? We’d love to hear from you in the comments below! And as always, stay tuned to the DVC Shop blog for all the latest developments around the Disney theme parks and Disney Vacation Club resorts.

We ordered ours yesterday from shopDisney and it was by pure chance. I had no idea it was the first day of availability! I am partial to the Disney Pride collection so I bought the one with the pride castle. Later that day I noticed that all special 50th anniversary and Walt with Mickey bands had sold out, as had the Millenium Falcon design.
We are going to the park in October and I can’t wait to link it!!
We love the new MagicBands! Be sure to check out our newsletter tomorrow for a special MagicBand announcement from DVC Shop. 😉 If you aren’t signed up for our newsletter yet you can sign up here.
Just received our 5 magic bands. 3 are linked to account (I can see them on the magic band page) but 2 are not. When I go to link them, says they are already linked but I can’t see them. How can I fix this so I can see them all?? Thanks.