
So you’ve secured your tickets to the A Touch of Disney event being held in California Adventure, and you’ve received your tickets by email. What now? In this article, we’ll be explaining exactly how to add your A Touch of Disney tickets to the Disneyland App, so you won’t have to fuss with printing them or risk not being admitted into the event. Read on to get a detailed tutorial on how to link your tickets to your Disney account within the Disneyland App.
1.) Download the Disneyland App
First things first, we need to make sure you have the Disneyland App installed on your iOS, or Android, device. You can find links below to download the app on your preferred platform below:
Apple App Store Link – https://apps.apple.com/us/app/disneyland/id1022164656
Google Play Store Link – https://play.google.com/store/apps/details?id=com.disney.wdpro.dlr
![]()
![]()
2.) Open Disneyland App, Then Tap Menu Button
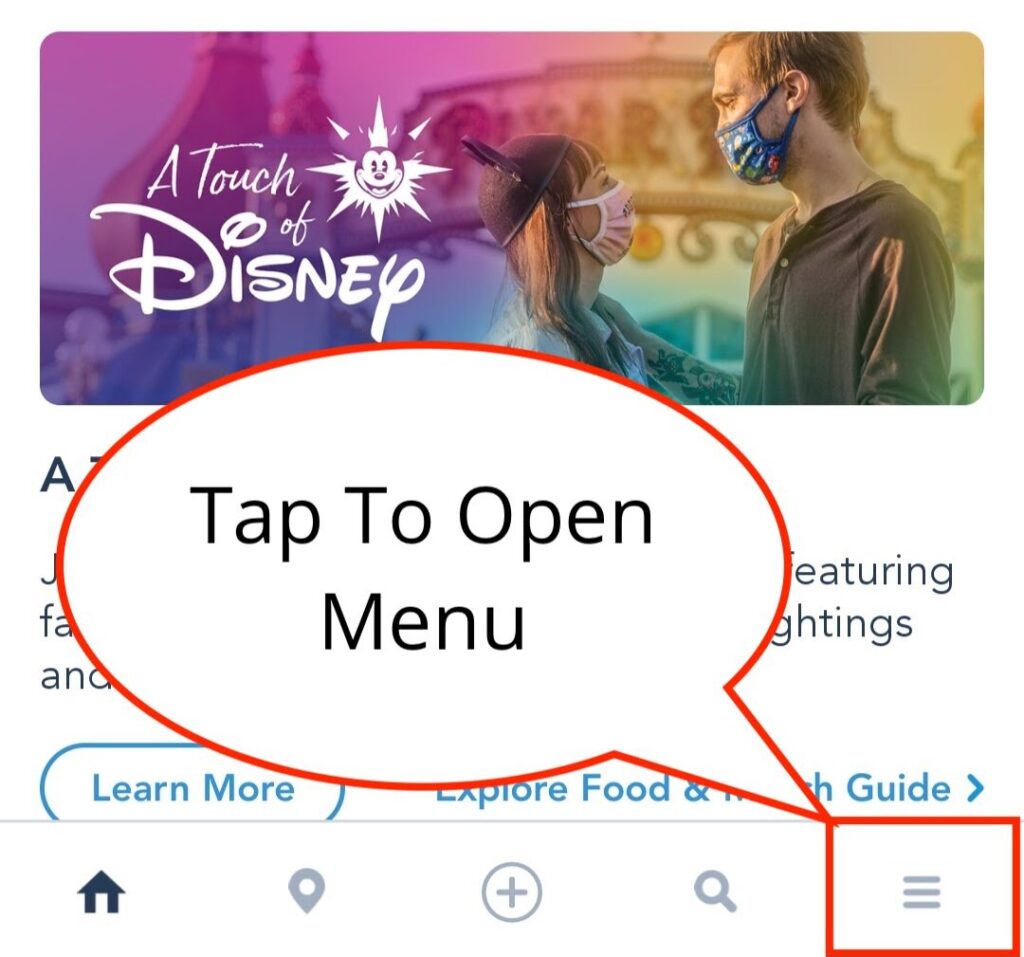
Next, we will need to open the Disneyland App and tap the menu button in the lower right-hand corner.
3.) Tap “Tickets and Passes” to Start Adding Your Tickets
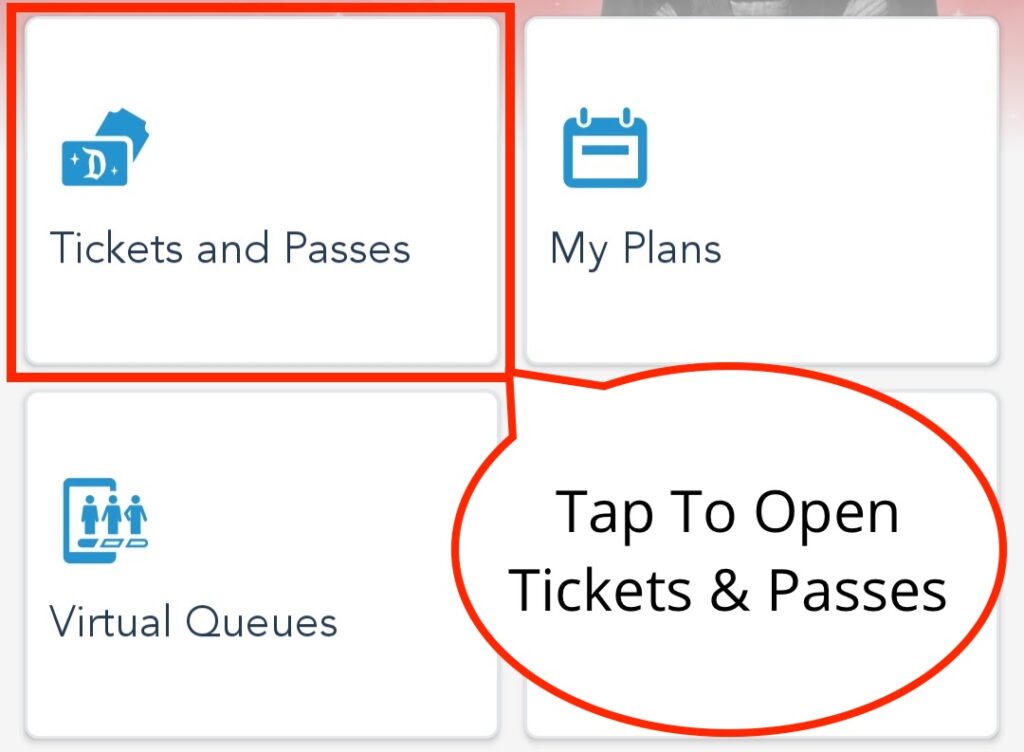
Once the menu pops up, on the top left-hand corner you will see a square button that reads “Tickets and Passes”, tap that button to continue the process.
4.) Tap “Plus Button” in Top Right-Hand Corner to Begin Adding Tickets
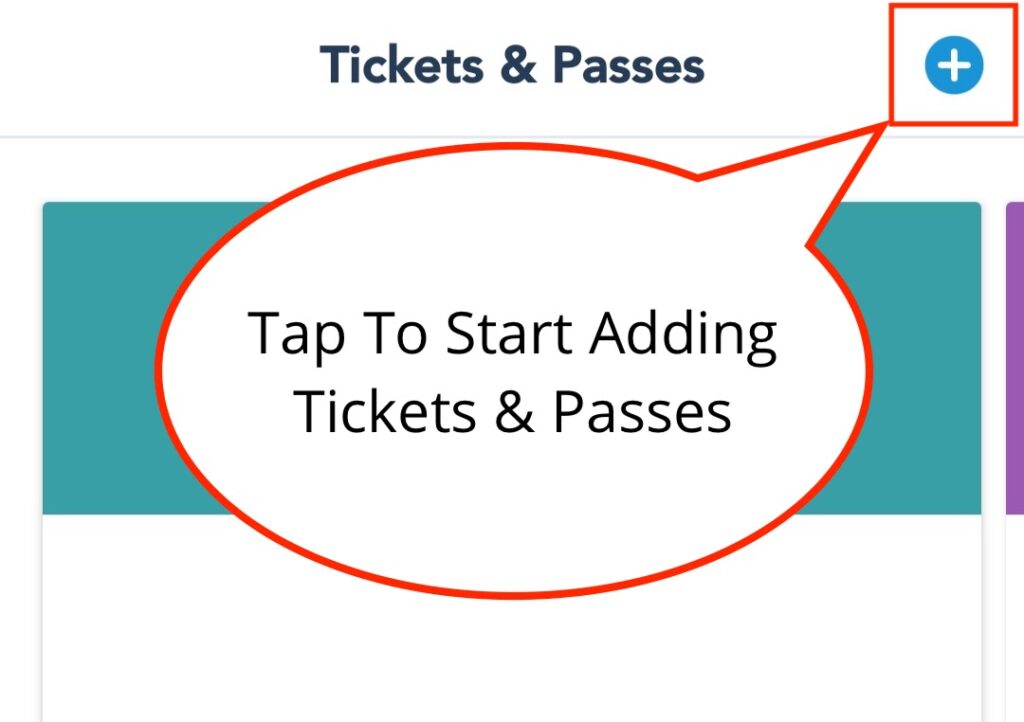
You will be taken to a screen titled “Tickets and Passes”, and you will need to tap the “plus” button in the top right-hand corner of that page to begin the process of adding your tickets to your Disney account.
5.) Tap “Link Tickets & Passes” Button to Start Linking
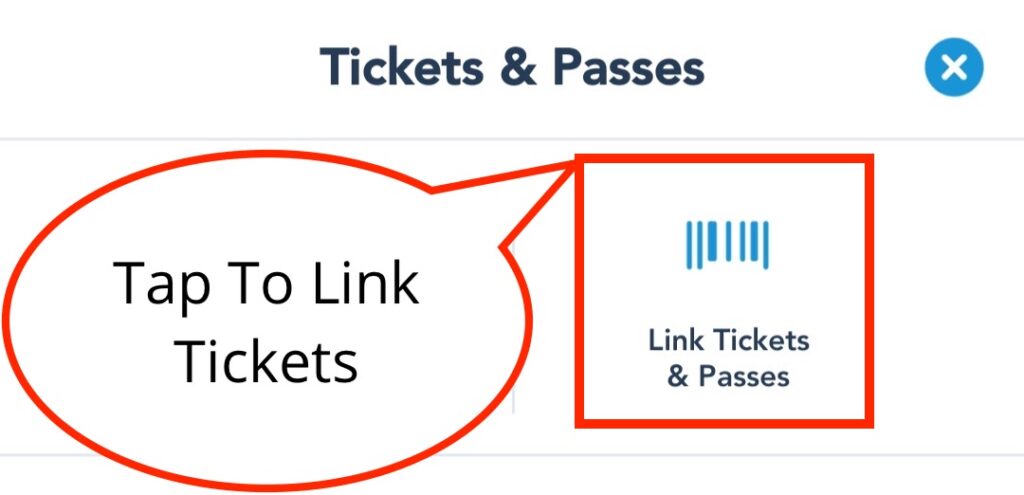
Once you’ve pressed the plus button from the last step, you will see the “Link Tickets & Passes” button, tap that button to be taken to the next step.
6.) Enter ID Code Into Text Box
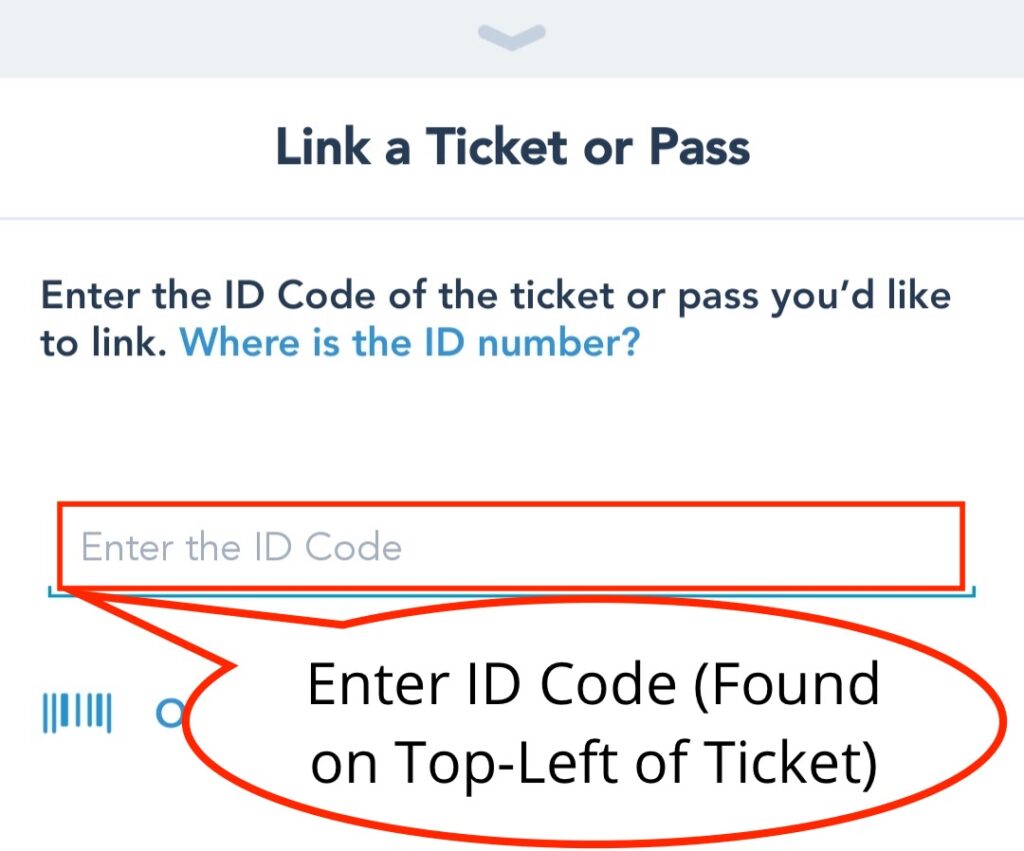
You will be taken to a screen titled “Link a Ticket or Pass” where you have a text box with the placeholder text “Enter the ID Code”. The ID Code for A Touch of Disney tickets can be found in the top-left of the ticket just under the barcode. We didn’t have much luck scanning the barcode, but that is an option if you can get the app to recognize the barcode. If your app is anything like ours, you will have to key in the full code to get it to work.
7.) Tap Submit Button After Entering ID Code

Once you have entered the ID code that is found on the top-left hand corner of your A Touch of Disney ticket, the “Submit” button will be active, and you’ll need to tap that button to continue to the next step of the process.
8.) Enter First and Last Name, Then Tap “Save” Button
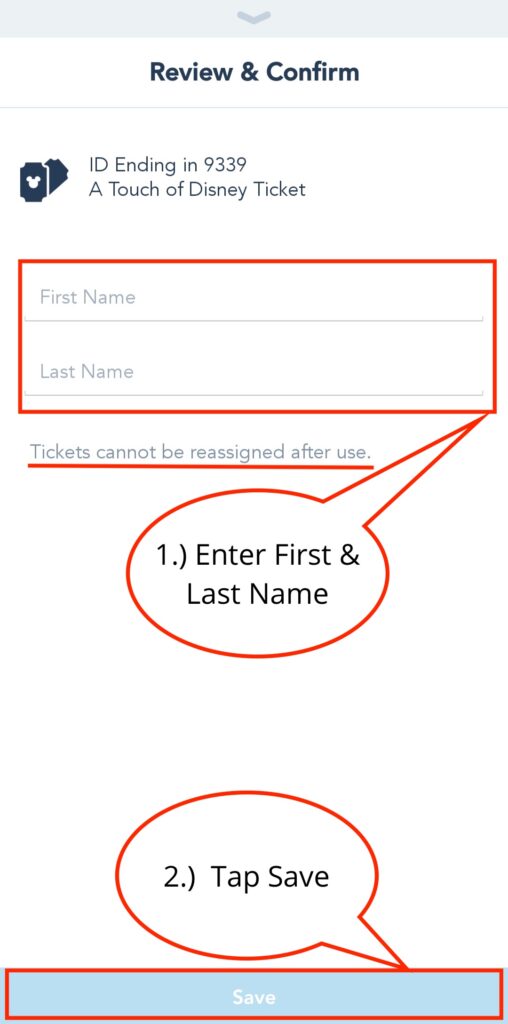
Once you have entered the First and Last name you want to assign to the ticket, the “Save” button at the bottom of the screen will become active. Before pressing the “Save” button, double and triple check that the First and Last name is completely correct. There is no way to reassign the ticket to another person, or fix spelling errors, once you press the “Save” button.
9.) Review A Touch of Disney Ticket Successfully Added to App
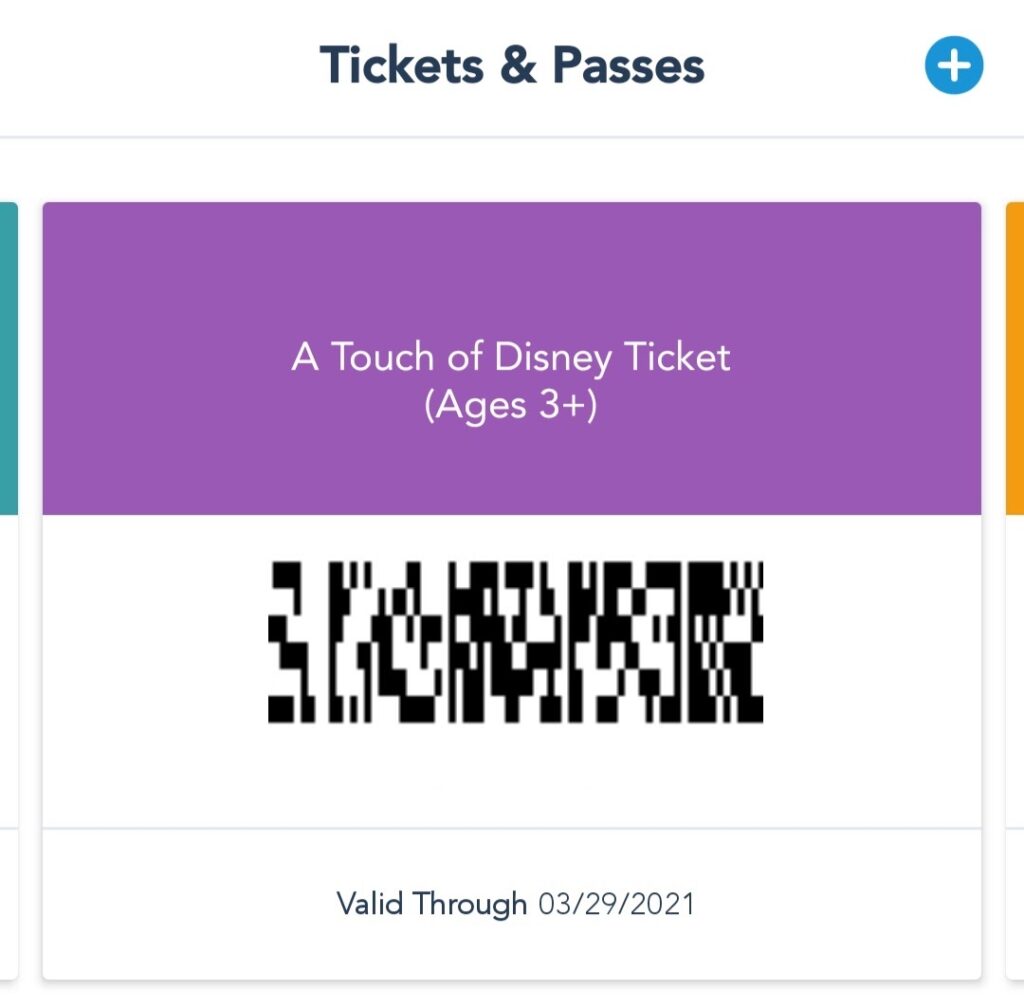
Once you have followed each of the previous steps, you will see your ticket(s) under the “Tickets & Passes” section of the Disneyland App. This shows you have successfully added the ticket. We have blocked out portions of our ticket shown above, but your ticket will show the name of the person the ticket is assigned to, the date your ticket is valid for, and have a full barcode that can be scanned to admit the assigned person into the event.
We hope this helps you understand the process of adding your A Touch of Disney tickets to the Disneyland App. This can be a great way to avoid printing tickets, and making sure each ticket you have is properly assigned to each member of your party. Feel free to let us know if you’ll be attending the A Touch of Disney event, and if so, what part you’re most looking forward to, by leaving a comment below!

Written by
Rachel Van Norman
![]()
Guest Author
Rachel fell deeply in love with all things Disney as a little girl. Now as a wife and a mother herself, she shares this Disney obsession with her son and everyone around her. From her love of princesses to eating all the Disney food, Rachel spends her time radiating Disney magic and keeping everyone up to date on Disney news.